

If you’re a beginner or a contractor, the table saw is one of the most basic and important tools in your workshop. It will help you cut boards, panels, and other materials with precision and accuracy. But that’s not all - when equipped with the right fence clamping system, it can do so much more. Let’s take a look at why it’s important to have a good fence clamping system on your table saw and how it works.
What is a Table Saw Fence Clamping System?
A table saw fence clamping system is a device used to secure the fence on the table saw surface. It helps ensure accuracy when cutting materials such as wood, plastic, metal, or other materials. The clamping system keeps the fence in place while making cuts. Without this device, the fence could move due to vibrations or other factors which can cause inaccurate cuts or even accidents if not handled properly.
Types of Fence Clamps
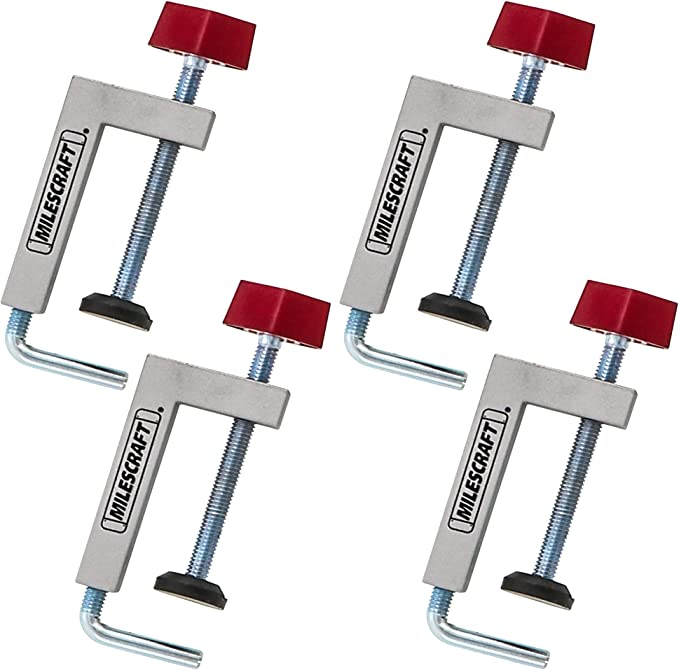
Milescraft 7209 Universal Fence Clamp 4-Pack - for Mitre Saws, Router Tables, Table Saws- Clamping Squares - 3/8" Rod - Rigid Aluminum Body - Woodworking Clamps
There are many different types of clamps available for table saws but they all work in basically the same way - by firmly holding down the fence so that it does not move during use. Some popular types of clamps include toggle clamps, cam-action clamps, and screw clamps. Each type has its own advantages and disadvantages but all are effective at keeping your fence secure while you work.
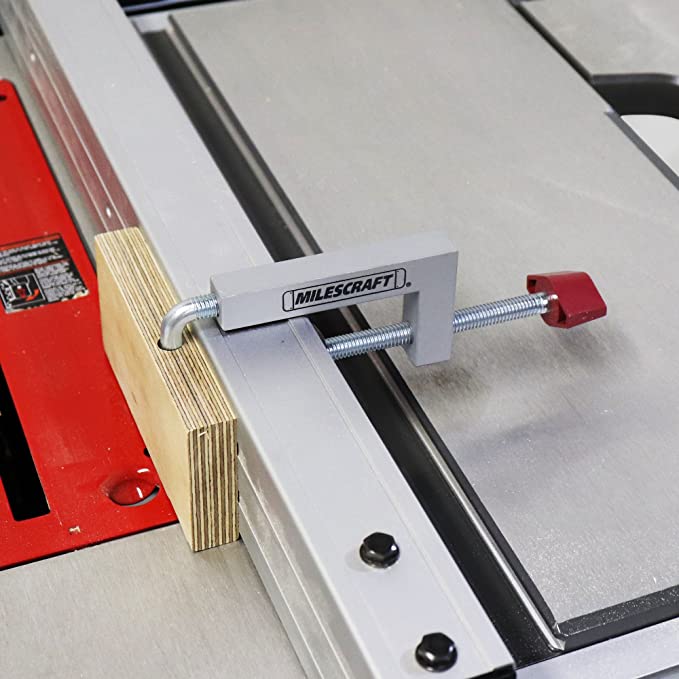
Milescraft 7209 Universal Fence Clamp 4-Pack - for Mitre Saws, Router Tables, Table Saws- Clamping Squares - 3/8" Rod - Rigid Aluminum Body - Woodworking Clamps
Benefits of Having a Table Saw Fence Clamping System
Having an effective clamping system installed on your table saw can provide numerous benefits including: better accuracy when making cuts; increased safety as movement of the fence is minimized; longer life for blades due to less vibration; improved efficiency as fewer adjustments need to be made before starting a cut; and lower noise levels since vibrations are reduced or eliminated altogether.
Conclusion:
A table saw fence clamping system is an incredibly valuable tool for contractors and woodworkers alike as it ensures accurate cuts every time while minimizing vibration, noise levels, and chances of injury due to moving parts or components coming into contact with each other unexpectedly. Whether you’re just starting out or have been working with wood for years, equipping your table saw with an effective clamping system will help make sure all your projects turn out perfect every time!
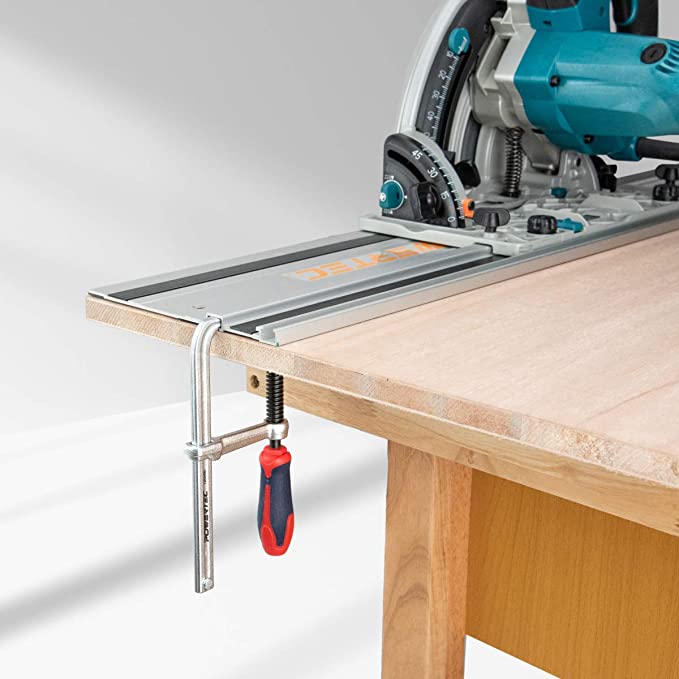
POWERTEC 71410 Quick Screw Guide Rail Clamp for MFT Table and Guide Rail System, 5-3/8” Capacity x 2-3/8” Throat Depth – 2 Pack
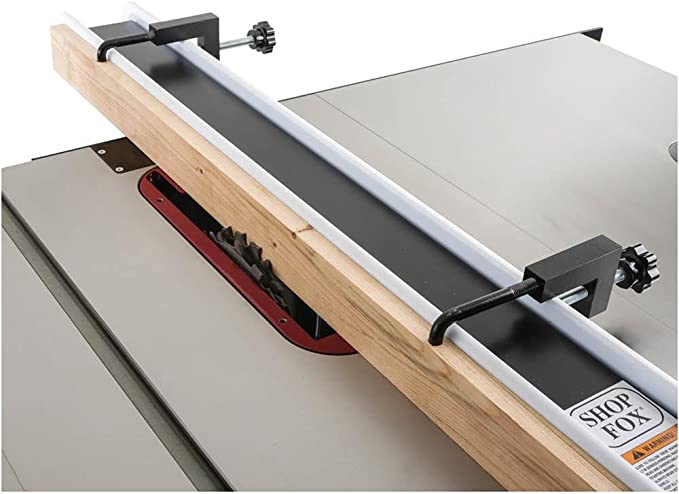
Table Saw Fence System, 37"×57" Classic Table Saw Fence Rail,
Get precise, dependable fence positioning with this heavy-duty rip fence system! It boasts a self-adhesive scale and magnified cursor for quick measurements. Plus the reliable cam lever action locks in your desired spot without any deflections while you guide wood - so it's secure every step of the way. To top it all off, innovative paint baking process is designed to resist wear and tear over time. Get started now on perfect cuts!
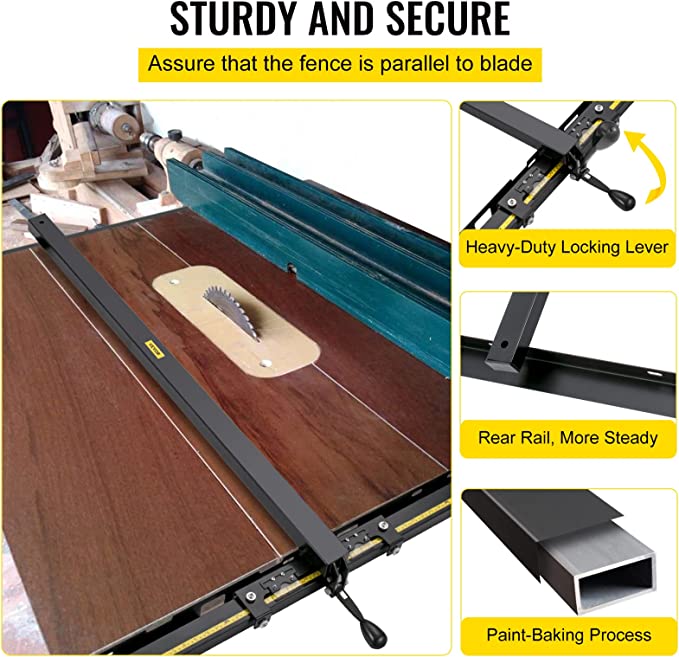
VEVOR Table Saw Fence System, 37"×57" Classic Table Saw Fence Rail, Metric/Imperial Scale, Adjustable Hole Saw Fence System, w/Front Guide Bar Table Saw Fence, Tablesaw Fence Slide for Easy Gliding
FAQs
1. What is the best way to clamp a table saw fence?
Answer: Looking for the right way to secure your table saw fence? Look no further - clamping is the key! Get a grip on accurate cuts with this helpful tool and create neat projects in record time.
When it comes to clamping a table saw fence, there is no one-size-fits-all answer. There are, however, a few methods that have proven successful for many woodworkers over the years.
The most popular way to securely clamp a table saw fence is using C clamps. To do this, simply place the head of the clamp onto the metal lip of your saw table surface and then use the other end of the clamp to grip onto your desired location along the fence rail. This method offers great stability and provides excellent holding power without interfering with crucial adjustments such as blade depth or bevel angle.
Another option is using locking lever clamps specifically designed for use on a router table—or any other type of precision machinery with exposed rails like a band saw or drill press. These jig clamps work just like C clamps except they can be tightened more quickly (and thus conveniently) by pulling down on their levers rather than twisting an adjustment knob.
You can also try making your own custom T-track clamps from scratch out of wood or aluminum stock material and attach them directly into grooves running through your tablesaw's fences and outfeed tables (if applicable). Not only does this provide strong tension but it also adds much needed versatility as you can easily attach/detach items like push blocks in seconds flat!
Whatever method you decide upon, just make sure that you keep all necessary screws tight at all times while ensuring they don’t strip when being removed during regular maintenance intervals throughout usage cycles; otherwise you risk ruining both projects at hand—the one inside & outside those four walls!
2. What are the benefits of using a clamping system?
Answer: A clamping system offers multiple benefits that make it one of the most popular and versatile tools in any workshop or toolbox. By using clamps in combination with screws, nuts and bolts, you can securely fasten two pieces of wood together quickly. This makes it an ideal solution for woodworking projects such as furniture construction, cabinetry work and deck building.
Clamping systems also offer a great deal of flexibility when it comes to positioning your materials – they allow you to attach two objects at various angles, which is especially helpful if you need to build an angled piece or join two awkward pieces of lumber together. You also have the freedom to adjust the tightness level for a stronger hold or even reposition them without having to remove any screws.
In addition, clamps are perfect for keeping long boards steady while gluing them together – simply clamp both sides of a board until the glue has set. This helps keep warping and buckling away from your precious project! You can also use clamps when drilling holes into boards along with other tasks such as sanding where fixtures won't fit around the project itself due to its shape or size.
Finally, standard hand-squeeze style clamps are relatively inexpensive compared with other specialized clamping devices – making them ideal if you just want something simple but effective on smaller jobs around your home workshop where more expensive equipment isn’t necessary. Whether you’re just starting out with DIY projects or an experienced carpenter looking for some extra help in getting your job done right - investing in a good quality clamp will always be worth every penny!
3. How do I set up a clamping system?
Answer: Setting up a clamping system may seem daunting, but it’s actually quite easy once you know the basics. Here are some steps to help you get started:
Choose the type of clamps you want to use. There are many types of clamps available that can be used for various purposes such as woodworking, welding and metal fabrication projects. Each type offers different levels of strength and stability so make sure to select ones that fit your application's requirements.
Determine what materials will be clamped together and measure the distance between them accurately with a ruler or measuring tape before deciding which size clamps you need to use. This is important as using the wrong size can lead to broken parts due to too much tension being applied or an improper seal created by not enough force being applied when clamping two pieces together.
Next, identify where on each part will require clamping and mark these points with chalk or marker pen so they’re easily visible when assembling your project later on down the line - this also helps lay out a plan for where best place your clamps in order achieve maximum grip power around components without compromising their shape or integrity during assembly operations in-between two parts needing connecting And don't forget about any spaces between components – small gaps can result in unreliable bonds if left unclamped during joining operations!
Securely attach your chosen type of clamp over marked areas and tighten until desired pressure is achieved - note that there should still be some slack remaining here depending on specific project requirements.. Use adjustable/sliding types if necessary Adjustable options allow users more control over how much pressure they need whilst sliding choices provide greater flexibility moving objects into position while still applying constant force until they’re securely fastened tight against one another at time ready for working upon
5 Finally ensure all bolts etc have been tightened appropriately away from over-torquing by exertion excessive amounts energy unnecessarily (and potentially damaging) surrounding material(s). The three main gauges used verify this include torque wrenches (for small applications), micrometres (for precision measurements) & dial indicators (great accuracy/manual protection). Once fully secure enjoy peace mind knowing whatever task involve tackling has now been safely secured completed satisfaction!
4. What are some of the best table saw fence clamping systems?
Answer: Table saw fence clamping systems are an important part of table saws, allowing you to lock your material into place while cutting. There are a number of different types of table saw fence clamps, each offering their own advantages and disadvantages.
Standard T-Slot Clamp: These are the most commonly used type of clamps that come standard with many high-end table saws. They offer a strong hold on your material and provide consistent width for cuts made through thick stock or plywood. Most standard T-slot clamps can be quickly adjusted and locked in place with either screws or thumb knobs, depending on the design.
Grip Clamp: Grip clamps work by using opposing pressure between two surfaces while firmly gripping the face of the material being cut on both sides simultaneously. Unlike standard t-slot clamps, these don’t put a lot of strain on materials as they don’t require tightness adjustments which may cause damage to delicate materials like thin veneers and laminates.
Overhead Bar Clamp: This is another ideal option for applying firm pressure to secure long pieces against the rip fence when cutting long boards or panels. Generally, overhead bar clamp tables have various grooves along its length so it will fit any size piece you need securely held onto the surface plate farther away from blade teeth at all times during use for ultimate safety measures against accidental kickback or binding due to angled cuts in wider boards when ripping off thin strips with feeder board/track rail combo set up for extra control over entire operation.. These tend to be more expensive than other models but may be worth it if you plan on making these sorts of cuts often as they allow better control without sacrificing stability even with larger wood sizes compared to other brands available out there such as those traditional ones featuring bolts instead just relying rubber feet underneath main body providing less force distribution evenly at greater distance away from blade itself thus increasing both accuracy plus efficiency during your specific tasks as well saving time overall..
Ratcheting Fence Lock : These locks work by ratcheting down onto your work piece while tightening its grip using levers placed along one side - similar in principle to grip locks above but much stronger! It also tends create less stress points overall; this makes them perfect choice when dealing fine details intricate projects where very precise measurements required achieving best results possible each time ensuring reliability throughout entire operation period whenever needed giving kind peace mind had not expected before given fact that particular models featuring reverse logic feature built already too further add convenience practicality usage end user's perspective alike..
Overall - what it boils down is finding right combination features offered within each model + price tag nailed package ensuring safety satisfaction preserving quality craftsmanship always highest priority before anything else comes play factor influencing decision process choosing one specific style mentioned above ultimately proving beneficial end goal purpose served here today!.
5. How do I choose the right table saw fence clamping system for my needs?
Answer: Choosing the right table saw fence clamping system for your needs is a very important decision. First, you’ll need to determine what type of saw and fence you currently have as this will influence which clamping system would work best for you.
In general, there are three types of table saw fences – Biesemeyer style T-Square systems, high-end shop Fox or Vega-style fences with integrated systems or basic round rail designs. The Biesemeyer style T-Square design is the most common and it has a locking device that keeps the fence in position while cutting material against the cutting surface. If this is your current setup then there are several aftermarket clamping systems available such as IncraLOCK, AirLock from Kreg Tool Co., and EasyLift from Rockler Woodworking & Hardware which are all great options for added stability and convenience.
The second type of table saw fence is high-end shop fox style fences with built in clamps like those found on Unifence or Vega Profence models. These systems are designed to provide solid repeatability when cutting multiple pieces with similar dimensions while ensuring that they remain in contact with both the left and right side stops simultaneously when adjusted along its length - perfect if accurate measurements are essential! Some models may even include micro adjustments so that you can fine tune your settings before making any cuts; look out for these additional features if this sounds like something useful to have handy.
Finally, some older round rail designs do not come equipped with their own clamps however companies like Bench Dog sell retrofit kits that can be used on various brands of dedicated miter gauges so check out these offerings too if yours needs an upgrade! No matter which system you decide to go with though always make sure it meets safety standards set by both ANSI (American National Standards Institute) and CSA (Canadian Standard Association). This way you can ensure a secure hold every time without worry about any potential injuries occurring during use.