

A zero clearance insert for a table saw is an extremely useful tool that allows you to make precision cuts with ease. It prevents your workpiece from tilting out of the saw’s path, and also helps to reduce tear-out. Unfortunately, these inserts can be quite expensive, so today we’re going to show you how to make one yourself!
What You Need: The materials needed are simple enough-- all you need is a piece of ¼” plywood or hardboard and some scrap wood. You’ll also need a few tools such as a drill, jigsaw, miter saw, and clamps. We recommend wearing safety glasses and gloves when operating power tools. Once you have all the materials in hand, it's time to get started!
Step 1: Create the Template Take your piece of ¼” plywood or hardboard and cut it into a rectangle shape slightly larger than the throat plate of your table saw. This will be your template for the insert. Make sure that the sides of the template are perfectly square; if they aren't then use sandpaper or a file to square them up before moving on to Step 2.
Step 2: Cut Out the Insert Now take your scrap wood and lay it on top of the template. Clamp down the template onto the scrap wood so that it doesn't move around while you're cutting it out. Use a jigsaw or circular saw to cut along the outline of your template-- but don't cut all way through! Leave about 1/8th inch of material at each side so that you have something to attach your zero clearance insert too later on.
Step 3: Trim off Excess Material Now grab your miter saw and trim off any excess material from each side of your insert until it is flush with your template's edges. Once again, be very careful not to cut all way through! Lastly, use sandpaper or a file to smooth out any rough edges if necessary before moving on.
Conclusion: Congratulations -you've just made yourself a zero clearance insert for table saw! Installing this insert is easy; simply remove the existing throat plate from your table saw and slide in this new one in its place using screws (not included). This homemade insert should help give you more control over what you're cutting and also reduce tear-out when making precision cuts. Plus, now that you know how easy it is to make one yourself, why not make a couple extras? That way you'll always have backup inserts ready whenever needed!
FAQs
1. What is a zero clearance insert?
Answer: A zero clearance insert is a device used to minimize the amount of material that gets trapped between the saw blade and its throat plate when making cuts. This can be especially useful for making fine or detailed cuts, as it helps prevent tearing at the cut edge of your workpiece. It works by creating a space between the blade and throat plate which allows shavings from the workpiece to escape without getting stuck in any way.
Technically, a zero clearance insert is a separate piece that’s installed onto your table saw’s existing throat plate. It has slits along either side which fit perfectly into slots found on both sides of most standard throat plates (although some may require drilling). The depth of these slits varies depending on what kind of material you intend on cutting - typically, they should be set just slightly deeper than the maximum thickness you plan to cut through so that no teeth miss out on contact with wood fibers when lowering down into a cut.
Zero-clearance inserts are incredibly helpful because they improve both speed and accuracy when cutting while also minimizing waste since less material gets caught up in areas around the blade where it can’t be retrieved easily. Additionally, using one eliminates any risk associated with kickback due to uneven tension across different parts of your workpiece during slicing – essentially acting as an extra layer of safety for even more precise results!
2. Why do I need a zero clearance insert?
A zero clearance insert is a must-have for any woodworker. It ensures that your saw blade makes the cleanest, most accurate cuts possible with each and every cut. These inserts help to prevent tear out of hard woods and chip out of soft woods when making a straight or compound miter cut. Plus, they eliminate the dangers associated with kickback due to too much space between the saw blade and other materials such as plywood or veneer that you may be cutting through at any given time.
Zero clearance inserts are designed to fit precisely into your saw table surrounding your selected blade size in order to provide maximum stability during cuts. This helps reduce vibration from the material being cut as it passes by the spinning teeth of the saw blades, thus leading to cleaner and smoother cuts every time - regardless if you're working on hardwoods or softer varieties like pine, poplar, and baltic birch plywood!
By using an insert specifically made for your particular saw model (or one that's been customized for you), chips cannot escape beneath the top plate while in use due to its tight tolerance fit around both sides of the upper part of your chosen blade’s body. Additionally, it can also act as a guard when setting up cut angles - preventing further mistakes caused by incorrect measurements because this insert will ensure measuring points are perfectly aligned each time!
In conclusion: If you take woodworking seriously – then having a zero clearance insert should definitely be involved somewhere in all your projects if only so that you get repeatable accuracy from start-to-finish with less risk for injury along side it!

Phenolic Zero Clearance Insert for Delta Uni-Saw Contractor | Large Grizzly and Other Table Saws with a 13-3/8” x 3-3/4” x 1/2” Throat Plate Opening
3. How do I install a zero clearance insert?
Answer: Installing a zero clearance insert is not complicated, but it does require some precise steps. The first step is to ensure that your table saw is unplugged and safely removed from any power source. You'll also need to make sure you have the correct size for your saw and that the one you're using has pre-drilled holes.
Next, place the insert into position on your table saw's throat plate. Make sure it fits snugly and that all four sides of the insert are flush with each other as well as flush with the top surface of the throat plate. If they aren't, use thin strips of wood to build them up until they are even before moving onto the next step.
Now use clamps or double sided tape to secure your zero clearance insert in place while keeping its edges firmly aligned against those of your throat plate again. If possible, try clamping down on each corner separately for best results; this will help minimize any warping or bending when you tighten it down later on in this process. Once you have everything in place and secured securely, move onto drilling pilot holes around all four sides of your zero clearance insert before finally screwing them into place with large flat head screws (these can usually be found at most hardware stores).
After everything has been tightened securely into position, turn on your table saw and check for blade wobble or tilt by carefully examining all four corners of your zero clearance inserts from below – if there’s any movement here then something may not be installed correctly so take care to check over everything once more before continuing onwards! Finally test out cutting through some scrap wood just in case anything needs readjusting or tightening again before beginning work on real projects - safety should always come first when working machines like these!
4.How do I use a zero clearance insert?
Answer: Using a zero clearance insert is an incredibly useful tool in woodworking, especially when it comes to creating clean and accurate cuts. Here's how it works:
First, you'll need to attach the zero clearance insert (sometimes referred to as ZCI) into your table saw. This piece of equipment fits snugly against the teeth of the blade and serves as a sort of "backstop" for your material. It helps reduce kickback, improve accuracy and make more even cuts across lumber pieces!
Once you've fully attached your ZCI onto the table saw, you can start setting up for use. First, measure the distance from one edge of the blade to the side of your ZCI — this will help ensure that each cut is aligned properly with one another. Also make sure that there are no gaps between where any edges meet on both sides — an incorrect measurement here could prevent proper insertion later on!
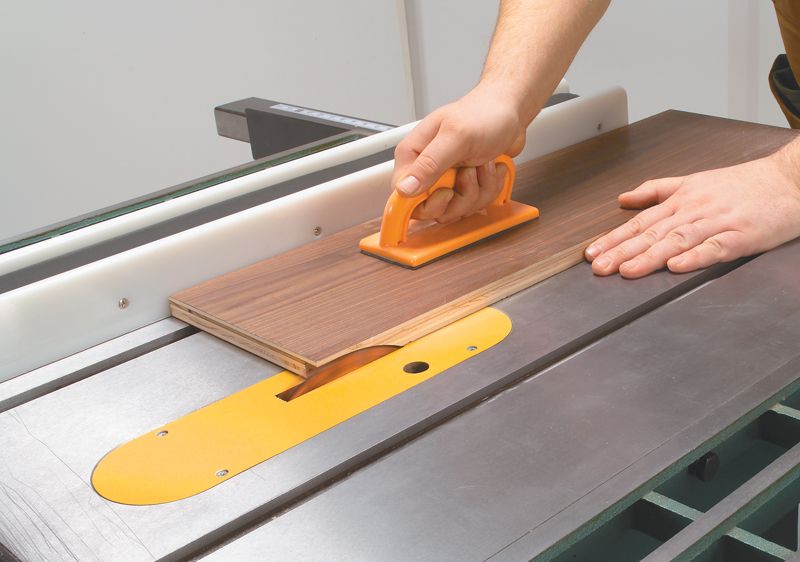
Next step is actually using it! Place whatever material you're wanting to cut on top of a fence or miter gauge and line up its edge so that it's touching both sides exactly right at their corners prior to pushing through; doing this will eliminate any misalignment issues in future cuts down line. Once all lined up correctly then lower slowly downward while applying slight pressure until flush—you should have a perfect cut every time!
Finally, if needed be sure clean off any debris from dust collection area once done before turning off power tools so as not block airflow which could cause them overheat—never leave until absolutely certain everything’s secure safe use again next go round. With these simple steps & regular practice with inserting/using Zero Clearance Inserts (ZCIs), cutting can become easier more precise regardless level skill expertise!