
The Dewalt miter saw is an essential tool for any contractor, builder, or DIY enthusiast. But when it comes to making cuts on thin crown molding, the saw can be tricky to maneuver. That’s why it’s important to know how to make a crown stop for your Dewalt miter saw. A crown stop allows you to cut your crown molding easily and accurately, without having to worry about those pesky angles and measurements. Here’s what you need to know.
Making the Crown Stop
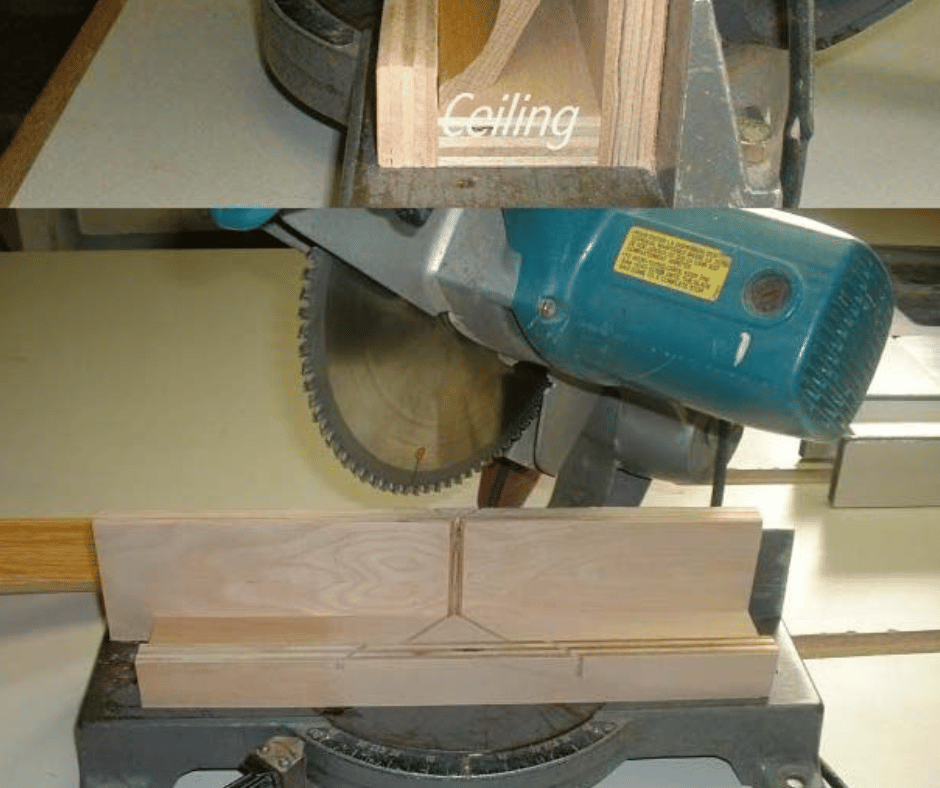
The first step in making a crown stop is to purchase the right materials. You’ll need some 1x4 lumber, a few screws, some wood glue, and a small piece of scrap wood. Once you have all of these supplies, you can begin assembling the crown stop. Start by cutting two pieces of 1x4 lumber that are 12 inches long each. These will form the base of your stop block.
Next, take one of the 1x4 pieces and cut it in half lengthwise with a miter saw so that each piece is 6 inches long. Place one of the 6 inch pieces on top of the other 12 inch piece and secure them together with some wood glue and screws. This will give you a rectangular shape that is 12 inches long and 6 inches wide; this will be your main base piece for your crown stop block.
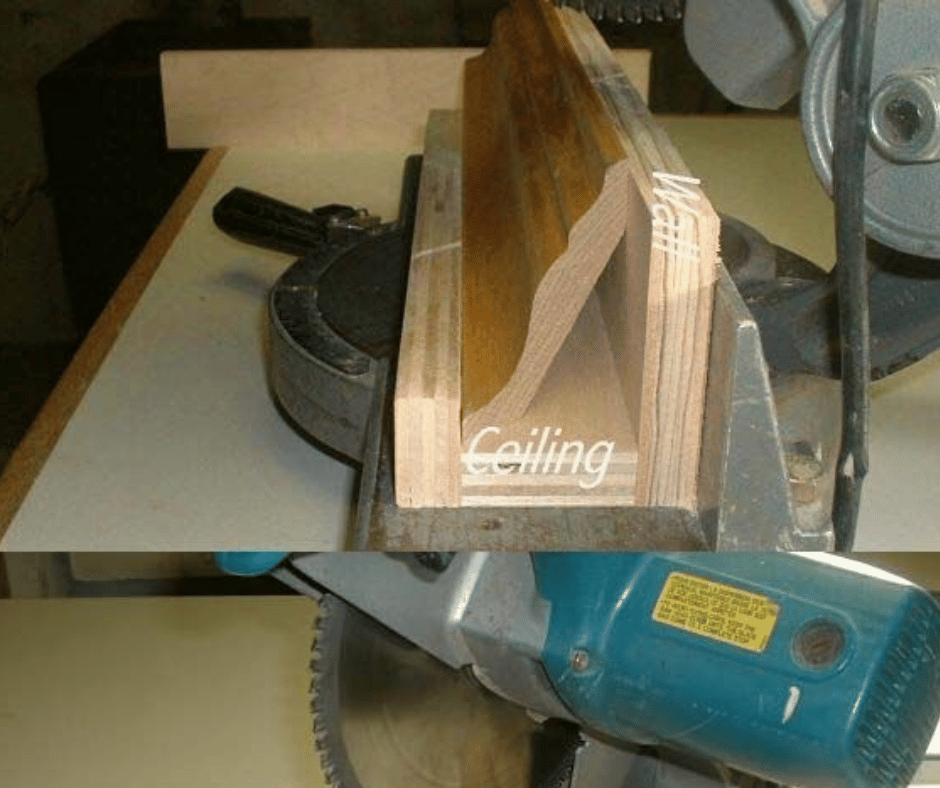
Then cut another 12-inch piece from the remaining 1x4 lumber and attach it across the top of the rectangular shape using glue and screws—this will form an "L" shape when viewed from above. Finally, add a few more screws along both sides of this top piece that will hold a small scrap piece of wood in place across its middle; this scrap piece should be around 3 inches wide and 5 inches long so that it fits nicely between both sides of the "L" shape when viewed from above (see diagram). This scrap wood will act as your guide rail for cutting thin crown molding with your miter saw.
Conclusion:
With these steps complete, you now have all you need for perfect cuts on thin crown molding every time! When using this set up with your Dewalt miter saw, simply line up the edge of your material with where the scrap wood meets either side of the “L” shaped board—this will ensure consistent accuracy every time! Making a crown stop for your Dewalt miter saw isn’t difficult; all it takes is some basic supplies plus patience and attention to detail! Happy building!
Now, if you don't have one, but is looking for a powerful and lightweight miter saw that is easy to transport?
Our 20V MAX* 7 1/4" Sliding Miter Saw has many features that make it the perfect choice for your needs. With its integrated XPS cross cut positioning system, you'll get better accuracy and visibility with every cut. The adjustable stainless steel miter detent plate ensures cutting accuracy, while the oversized bevel scale makes setting the desired angle quick and easy. And at just 30 lbs., this saw is easy to transport and store when not in use.
You'll be able to tackle any project with ease using our 20V MAX* 7 1/4" Sliding Miter Saw. With its 45° Bevel Cut Capacity, 45° Bevel Cut Capacity, 90° Cross-Cut Capacity, this saw can handle a wide variety of cuts. So whether you're framing a new house or building a deck, this saw will help you get the job done quickly and easily.
Purchase your 20V MAX* 7 1/4" Sliding Miter Saw today on our website!