

If you’ve ever wanted to learn how to use a 10 1/4 inch circular saw, you’re in the right place! This blog will provide you with all of the information and tips you need to properly use this essential tool. We’ll cover the basics of how to get started, as well as some advanced techniques that will help you master the art of using a 10 1/4 inch circular saw. Whether you’re a beginner or an experienced DIYer, this guide has something for everyone. So let’s get started!
Safety First - Always Wear Protection!
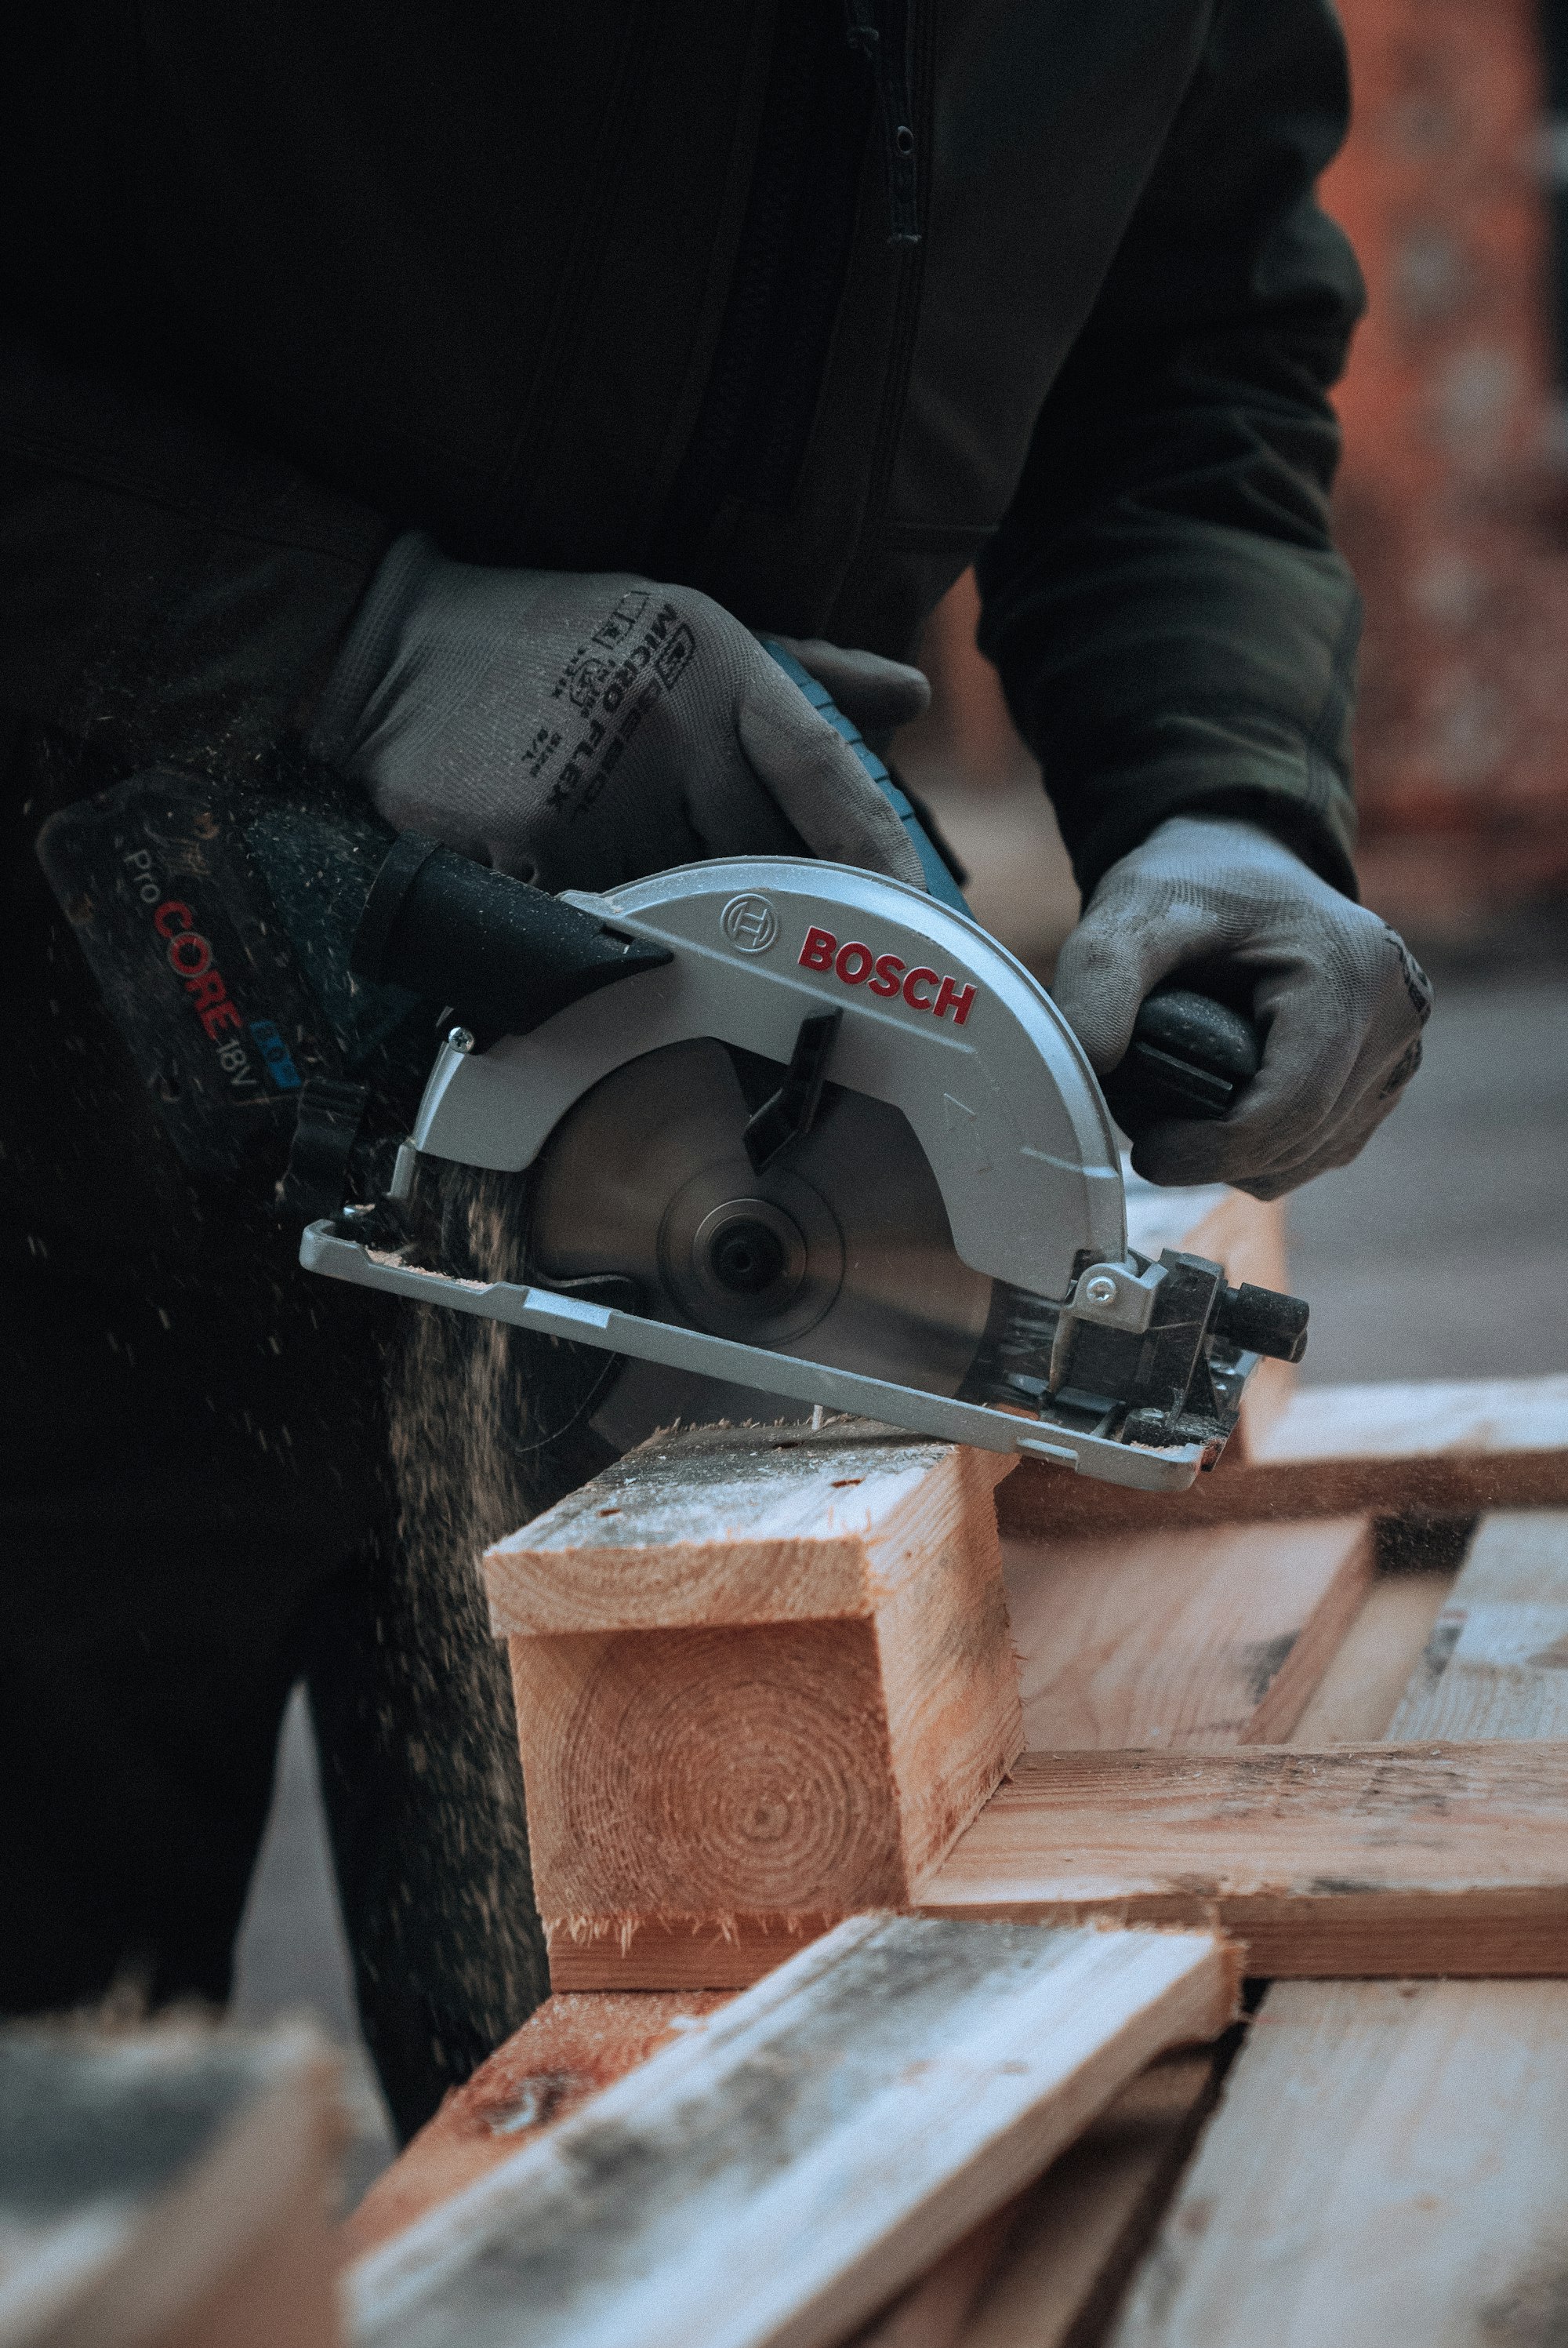
When it comes to operating any kind of power tool, safety needs to be your top priority. That means wearing protective eyewear and gloves at all times when using the saw, and making sure that the area around where you are working is clear of any obstructions or potential hazards. Make sure that your clothing is also secure; loose clothing can become entangled in moving parts and cause injury. Additionally, always make sure that your saw is unplugged when not in use and that it is securely mounted on a workbench or table before beginning work.
Understanding Your Saw
The first step in mastering how to use a 10 1/4 inch circular saw is understanding exactly what it can do for you. The most important thing to know about this saw is that it can make precise cuts in thick materials like lumber or hardwood flooring. This makes it perfect for cutting crown moldings, door trimming, window casing, and other similar tasks. It can also be used for basic straight-line cutting tasks like crosscutting plywood sheets or ripping 2x4s down into smaller pieces.
Using Your Saw Properly
Now that we’ve gone over safety guidelines and understand what our saw can do, let's dive into how to actually use it correctly! Start by setting up your work area correctly; make sure there's plenty of room for both yourself and the saw – if possible set up the material so that it rests directly on sawhorses rather than having to hold it while cutting so that your hands are free from danger. Adjust the depth gauge so that only enough material will be cut away as needed; too deep of a cut could damage underlying materials or even cause kickbacks which could throw off your accuracy and potentially cause injury. Finally, adjust the angle guide so that your cut will be parallel with whatever surface you are working on – this will help ensure accuracy during each cut! Finally when its time to begin cutting remember slow steady movements with ample pressure applied gradually as needed but never more than necessary - this will ensure clean cuts every time without damaging underlying materials or yourself!
Conclusion:
Using a 10 1/4 inch circular saw doesn't have to be intimidating - just remember these tips whenever starting a new project involving wood cutting: always wear protective gear (gloves & goggles), take proper safety precautions (unplugging & mounting), understand exactly what type of projects its best suited for (precise cuts & ripping) & finally practice slow steady movements with ample pressure applied gradually as needed but never more than necessary - this last tip ensures clean accurate cuts while preventing kickback & injury due to over exertion on part of user! With these tips & tricks anyone should now feel confident enough tackling any home improvement project involving woodcuts with ease & accuracy- happy DIYing everyone!!!
FAQs
1. Wha is a 10 1/4 inch circular saw?
Answer: A 10 1/4 inch circular saw is a handheld power tool typically used for cutting through wood, plywood, particle board and metal. It has a blade that rotates in circles at high speed and the most common type of circular saws have blades with diameters ranging from 4 inches to 24 inches.
The 10 1/4 inch model is popular due to its versatility. It’s capable of making cuts up to 45 degrees, allowing you to make beveled edges or follow curved patterns like those found on molding and trim work. Additionally, this size allows you to make thinner cuts as well as wide 2x material without having the weight associated with larger models.
When using your 10 1/4 inch circular saw it's important to wear safety glasses and other protective gear such as ear plugs or dust mask since these tools are loud and generate a lot of dust particles when in use. It's also essential that you take the time between each cut-off job needed so that there isn't an additional unnecessary strain on both the operator and their hands - especially when doing overhead work great care should be taken into consideration for injuries related to repetitive motion tasks such as operating a power saw! Proper posture is also very important - aligning your arms correctly helps prevent fatigue quickly setting in which could lead not just muscle soreness but potentially more serious injury over time if no precautions are taken early on in the process.
Additionally, always keep your blade sharpened (check out ExpertVillage for tips!) replacing them regularly with quality blades appropriate for whatever material you're trying to cut through; dull blades won't just create an incredibly bad finish but can often rip away materials unsafely flinging debris across the room potentially leading not only scratched surfaces but exposed nails too! Lastly do check whether or not your 10 1/4 inch circular saw needs any special accessories depending on what kind of projects you're working on - some jobs require special guides like jigsaws while others may need dedicated attachments usually sold separately so learn what exactly fits best with yours before investing any money further!
2. How do I use a 10 1/4 inch circular saw?
Answer: Using a 10¼-inch circular saw is relatively simple and straightforward. Before you begin, ensure that your saw has been set up properly to ensure optimum safety and accuracy.
First, make sure the blade of your circular saw has been installed correctly. This means checking the arbor nut to see that it's tight, securing the blade washer against the flange of your saw's arbor, and adding anti-kickback pawls if needed (usually on rip cuts). Make sure to use appropriate personal protective equipment such as eye protection goggles or glasses when setting up a circular saw.
Next, adjust the depth of cut for your particular task by loosening the screw located at the front of your tool’s base plate then turning it until you reach the desired depth mark on its collar ring slot. Once you've done this, tighten down the screw securely again before continuing with cutting operations.
Thirdly, move onto selecting which type of blade best suits what you want to accomplish (a crosscutting or ripping one). Depending on what material is being cut may influence which one is used as well - so double check accordingly!
Fourthly, start cutting along either straight lines or curves by pressing down gently on both handles and making confident passes across surfaces in order for a clean finish – letting gravity do most of the work here helps too! To help keep everything in line during longer cuts consider using clamps or other types of stabilizers so there’s no slippage from side-to-side movement while going through materials like wood panels etc… Lastly don’t forget about dust collection systems available too – they make cleaning up much easier afterwards.
Now that all these steps have been taken care off successfully - you should be ready to cut accurately with confidence using your 10¼ inch circular saw! Good luck!
3. What are the benefits of using a 10 1/4 inch circular saw?
Answer: Using a 10 1/4 inch circular saw provides a variety of benefits for DIYers and professional carpenters alike. The most significant benefit to using this type of saw is its portability, which allows you to work on projects away from the shop. This makes it an ideal choice for those who need to cut materials in tight spaces or outdoors.
The larger blade size also means that this type of saw can make deeper and wider cuts than smaller circular saws, making it powerful enough for more difficult tasks such as cutting sheet goods like plywood and MDF. It’s able to produce straight and accurate cuts with minimal effort due to the high-powered motor, which helps achieve perfect results each time.
The adjustable bevel capacity gives you further control over your work by allowing you adjust the blade angle up to 45 degrees—making angled cuts much easier than before! And with easy-to-use depth stops, changing the depth of your cut is as simple as adjusting a knob or lever depending on what model of saw you have.
Finally, because these types of saws are compatible with a large range or blades that have different teeth configurations (i.e., ripping blades versus crosscutting blades), they offer versatility that other models don’t provide while still delivering plenty of power even when used on tougher materials like steel or aluminum alloy sheets!
4. How do I set up my 10 1/4 inch circular saw?
Answer: Setting up a circular saw is a pretty straightforward process that requires basic assembly and understanding of the components.
First, assemble the saw base to the rail. Make sure that both are securely affixed together before you move onto any other tasks associated with your 10 1/4 inch circular saw setup.Next, put together all additional parts such as power cord, blade guard, mounting screws and guards for clamping down (if applicable). Pay attention to manufacturer’s instructions; make sure to follow these closely as this will ensure maximum safety when using your saw.
Once everything is assembled properly you will need to check alignment on a flat surface or table top. Adjust if necessary so that it cuts straight forward and back along the cutting path in order to have precise cuts when making any projects.
Now it's time for you to mount your blade onto your saw base and set its depth adjustment wheel so that it works perfectly while cutting material (wood, plastic etc). If there is no adjustable depth feature on the unit then simply measure out where the cut should be made before powering on tool via switch or handle trigger depending upon what type of model you have purchased! After doing this safely – proceed with making small test cuts until satisfied before tackling larger projects! Overall setting up your 10 1/4 inch circular saw shouldn't take too long but will depend heavily upon following all manufacturers instructions properly in order for successful results every time; just remember safety first at all times as well as proper use & maintenance practices whenever using power tools like this one!
2. How do I use a 10 1/4 inch circular saw?
Answer: That’s an excellent question! A 10 1/4 inch circular saw is a great and versatile tool for any DIYer or professional contractor. Here's how you can use it with ease and confidence:
First, check your saw to make sure the blade guard is properly installed and in good working order. Never operate the saw without a blade guard; it provides protection from risks like kickback or accidental contact with the rotating blade.
Next, select the appropriate power cord for your particular job. Make sure you have sufficient length so as to avoid dragging it across surfaces during use. If using an extension cord, ensure that it's rated correctly for your specific model of circular saw – otherwise you risk damaging both yourself and the machine.
It’s also important to select a suitable blade to suit whatever material you want to cut – usually this means one fine-toothed general purpose sawblade (like those used on miter or radial arm saws) will suffice for most applications involving woodwork, plywood, plastic etc., but if cutting metal then diamond coated blades are probably better suited. Be sure to double-check all measurements before making any cuts - ensuring accuracy is essential when dealing with hazardous equipment like this!
Once everything’s ready – set up workpieces on secure surfaces that won't move around while in use (optionally securing them further if necessary). Keep hands off of dangerous areas such as near spinning blades at all times; similarly do not place fingers anywhere near the line of cut until after shutoff procedure has been completed satisfactorily - take extra caution here & always wear personal protective gear too! Lastly connect your chosen power source & adjust speed settings if possible/required; from there simply start up the motor & begin work - guiding with steady strokes along convenient paths through materials being processed whilst maintaining safe operating practices throughout entire task duration…and voila - now you know how easy it can be to utilize 10 1/4" circular saws safely & productively!
3. What are the benefits of using a 10 1/4 inch circular saw?
Answer: Using a 10 1/4 inch circular saw is a great way to make precise and accurate cuts in larger pieces of material. The larger blade size gives you more power, control, and accuracy when cutting – something that cannot be achieved with smaller saws. Here are some of the benefits of using one:
Power and Precision – A 10 1/4 inch circular saw is perfect for making large, powerful cuts in thick materials like hardwood or steel. It has enough power to easily cut through these types of materials with precision, ensuring straight lines and smooth edges every time.
Safety – Thanks to its size, the 10 1/4 inch blade also offers improved safety features. Its longer blades provide additional stability when cutting, helping you maintain better control over your workpiece. Additionally, its heavier base helps reduce vibration during use, reducing risk of accidental slips or kickbacks from the saw’s motor.
Versatility – This type of saw can be used for a variety of tasks ranging from basic home repair projects to detailed carpentry work such as dovetailing joints or installation jobs requiring miter cuts. With this type of tool at your disposal you will be able to create many different pieces quickly and precisely without having to switch out tools constantly which can save time on bigger projects as well as money on extra supplies needed by other devices such as routers and jigsaws that would otherwise need purchasing if they were ever required later down the line!
Overall there are numerous advantages associated with using a 10 1/4 inch circular saw; however it’s important that anyone who chooses this tool understands how best to operate it safely before attempting any kind of project so please take precautions such as wearing protective equipment (e.g eye goggles) , checking for proper torque settings on blades etc…. Be safe out there!
4. How do I set up my 10 1/4 inch circular saw?
Answer: Setting up your circular saw is an easy process that only takes a few minutes. First, locate the user manual for your specific saw model and read through it thoroughly to familiarize yourself with its components and safety precautions. Once you are comfortable using the saw, assemble all related items including the corded power source, arbor wrench, blade guard assembly and rip fence.
Next, choose a suitable blade for your project- look at both diameter size as well as teeth per inch (TPI). The larger the diameter of the blade determines how deep into material it can cut; typically 10 1/4” blades are used to cut thick materials or plywood but you may also want to consider one with 50 or more TPI if you want finer cuts in thinner stuff. Ensure that any beveling adjustments on the saw have been reset to their factory settings before inserting your selected blade – this will make sure there is no binding when cutting and reduce kickback risk.
Connect either end of the power cord by plugging one into an outlet near where you will be working (be aware of waterproof outlets if necessary) and threading it through hole in handle then connecting other end securely into back side of circular saw's motor housing - ensure tight fit without twisting wire excessively so that it stays secure while operating! Securely tighten arbor nut using arbor wrench until tightness feels just right – being too loose causes wobbling from spinning motion which could result in injury but being too tight may damage threads so use good judgement here before continuing onto next steps:
Check alignment of base plate against shoe assembly by holding square edge against faceplate edge with light pressure; adjust screws along sides until both pieces align perfectly then tighten them down snugly as this gives better control & accuracy when making angled cuts later on! Finally put guard above cutting surface area so debris won't get thrown into eyes- set angle adjustment lever according desired cutting line then flip switch "on" when ready start slicing material like butter! With these steps complete: congratulations - now enjoy accurately slicing through those projects faster than ever before!