
If you’re into DIY projects, then you know just how important the right tools are. One tool that should be at the top of your list is a center drill holder. Not sure what one of those is? Read on to find out why having a center drill holder in your life will make all of your home projects easier and less stressful.
What Is a Center Drill?
A center drill is basically a multi-purpose hole saw that can be used to cut holes in various materials, such as wood, plastic, or metal. It's small and lightweight so it fits easily into most home workshops or toolboxes. The center drill has two cutting edges—one at the top and one on the bottom—that allow you to quickly cut through materials without having to worry about damaging them. Plus, it's easy to use and doesn't require any special skills or power tools.
Why Do I Need a Center Drill Holder?
Despite its small size, using a center drill can still be tricky if you don't have the right equipment. That's where the center drill holder comes in handy. It's designed to hold the center drill securely in place while you work so that you don't have to worry about it slipping or moving around during use. This makes it much easier to get accurate cuts every time so that your projects turn out looking great!
The Benefits of Using A Center Drill Holder
Using a center drill holder has many benefits beyond just making it easier for you to get perfect cuts every time. It also helps protect both your hands and the material being cut from any potential damage caused by slipping or misalignment during use. Additionally, it can help speed up your project since there won't be any wasted time trying to get everything lined up correctly before cutting begins. Lastly, having a reliable way of securing your center drills makes them last much longer since they won't wear down as quickly due to constant movement or misalignment during use.
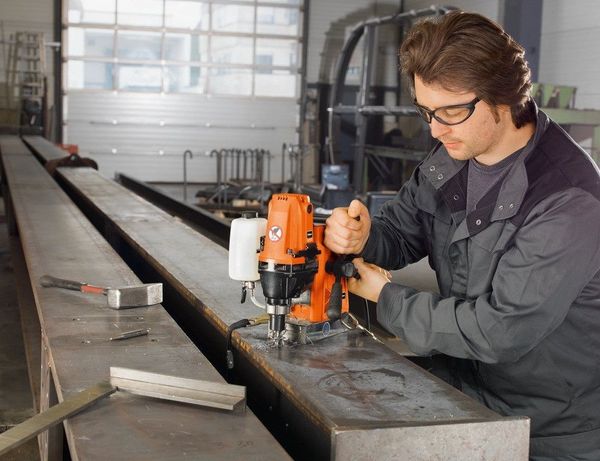
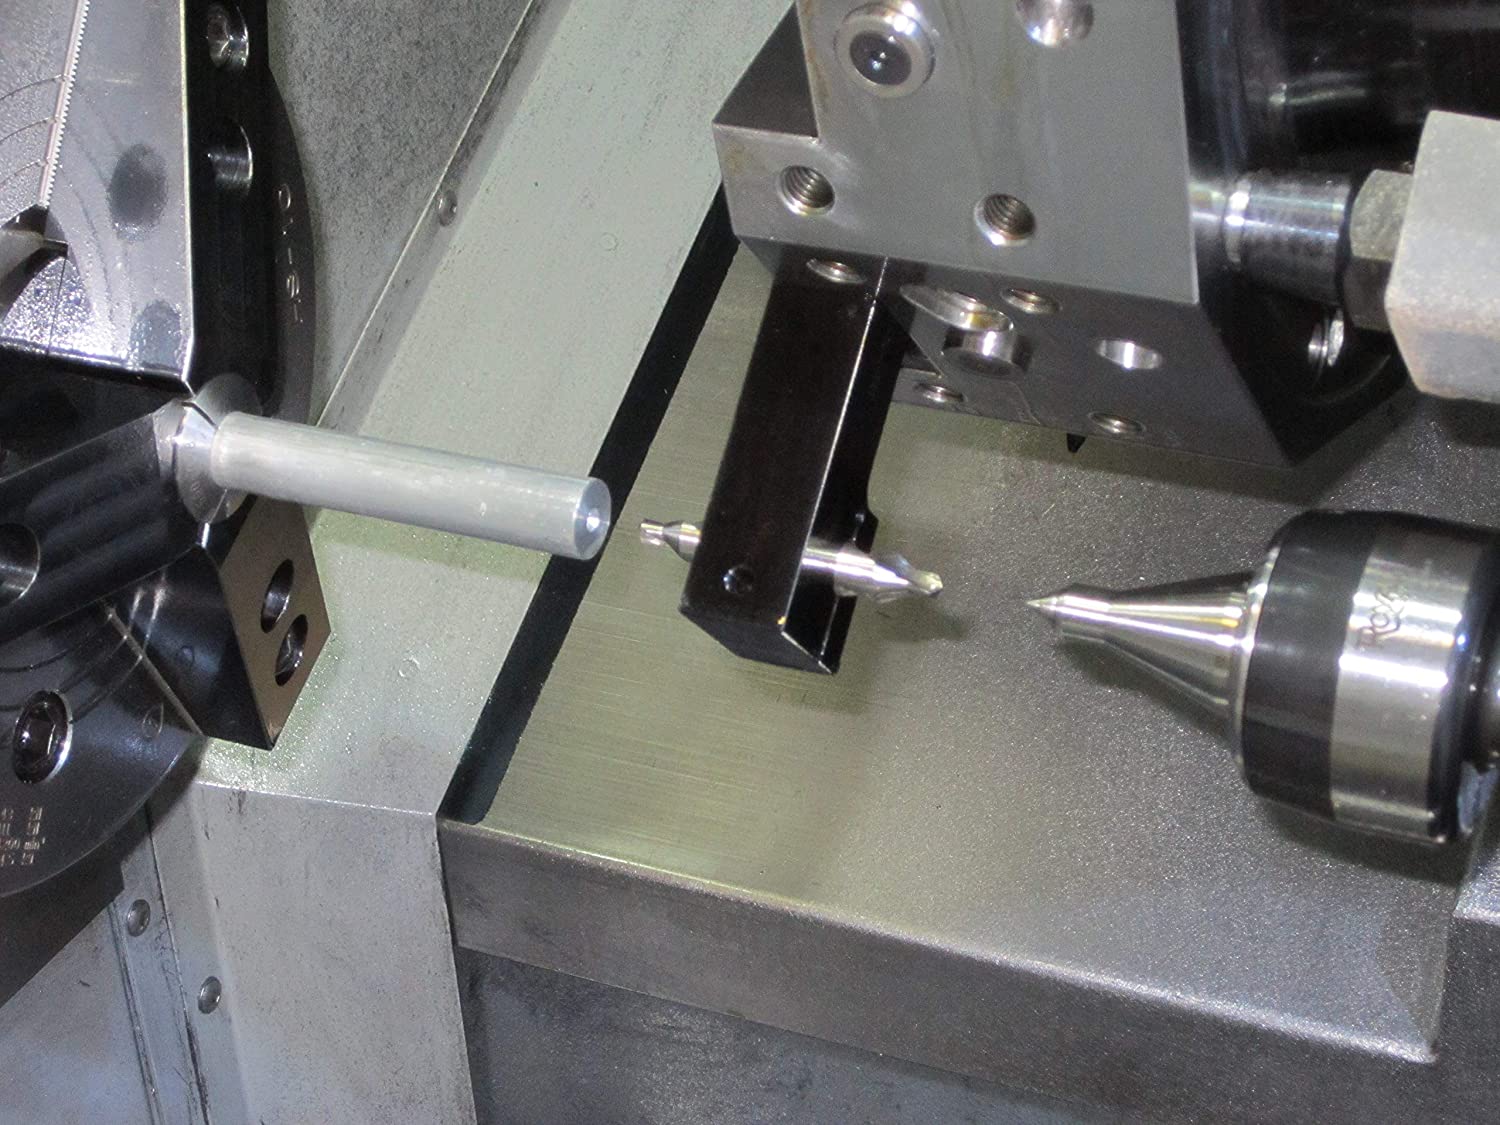
Do you have a CNC lathe and find it difficult to get into the narrow space between the end of the part and the tail stock?
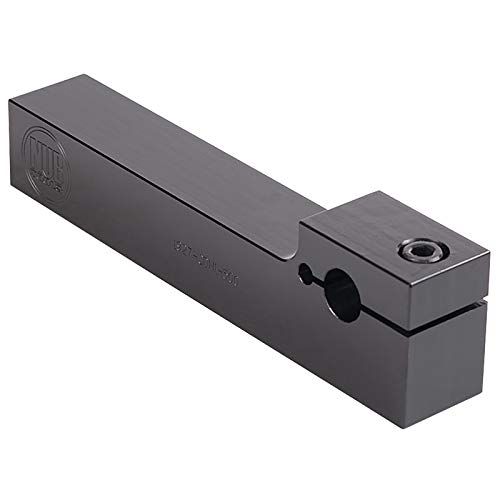
Interest: Nub Tools has created a Center Drill Holder that will allow you to get into that tight space with ease. This square shank tool holder is perfect for combined drills, center/spotting drills, counter sinks, drills, and boring bars.
With a max center drill diameter of 1/2″, this tool holder can handle any job you throw at it. The kit includes the tool holder, wrench, and 6 reducer bushings so you can use any drill size you need. Plus, 1″ shanks are available if needed.
Purchase your own Center Drill Holder today!
Why We Love It:
The Lathe Center Drill Holder 3/4 Inch Square Shank is a great tool for builders and DIYers. It frees up drill chucks and collet holders, and increases tooling arrangement flexibility. It can be used on manual and CNC tool room lathes, and comes with a drill bushing reducer set for 1/8", 3/16", 1/4", 5/16", 3/8", and 7/16" drills.
What You Should Know:
This product has dimensions of 15.24 x 1.91 x 3.18 cm and weighs 612 grams. It was first available on October 30, 2019 and is manufactured by Nub Tools. It has an ASIN of B07MVJZNFK and a manufacturer reference of 1927-CDH750-500. This center drill holder is a great tool for builders and DIYers who want to free up drill chucks and collet holders, and increase tooling arrangement flexibility.
Conclusion:
If you're looking for an easy way to make all of your DIY projects look great, then investing in a center drill holder is definitely worth considering! Not only does it make cutting materials easier and faster than ever before, but it also helps protect both your hands and materials from potential damage caused by slipping or misalignment during use. So if you're serious about getting professional-looking results from all of your DIY projects, then having a reliable center drill holder is essential!
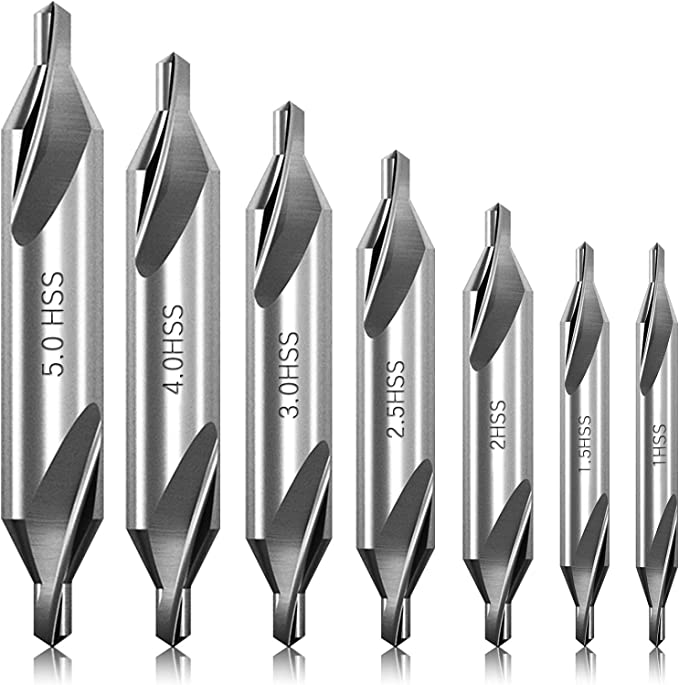
7 Pieces Center Drill Bits Set, M2 High Speed Steel 60-Degree Angle Center Drill Bits Kit Countersink Tools for Lathe Metalworking Size 1.0 1.5 2.0 2.5 3.0
FAQs
1. What is the purpose of using center drill?
Answer: Center drills, also known as spotting or center punch drills, are specialized types of drill bits that are used to create a small indentation at the center of an object. This is often done in order to allow for more accurate drilling operations when creating holes on a non-symmetrical surface. They can also be used for counterboring, countersinking, and other precision milling operations. Center drills come equipped with two different tips which work together to produce the highly accurate centering that allows for proper alignment during further machining processes.
2. Which material is used for center drill?
Answer: They say center drills are like the glue that holds any project together - and they’re right! Center drills, also known as counterbores or countersinks, are precision-cut drilling tools designed to make accurate holes in material for fastening screws. But what exactly is their favorite material? Well, the answer might surprise you: High Speed Steel (HSS)!
High Speed Steel is a particularly hard metal alloy made from iron and carbon that can withstand high temperatures and spinning forces better than most materials. It also has excellent wear resistance and strength, making it ideal for use in center drills. Plus, HSS comes in different grades to suit a variety of projects – like M2 or M35 – which allows users to customize their drill bits according to their needs.
3. What are the key features of a Centre drill?
Answer: The Centre drill is one of the unsung heroes of the home workroom. This seemingly small tool can make a big difference in quick and accurate drilling jobs, and if you're looking for something to make your DIY projects easier, this could be it!
The main feature that makes a Centre drill so special is its ability to center-mark objects with accuracy. A Center Drill typically has two flutes (cutting lips), which generate an exact center point on cylindrical objects. Plus, they also come in handy when starting hole-drilling operations—as they provide accurate drilling guidance without having to manually mark out the area beforehand.
In addition to providing more precise centering marks, Centre drills are also incredibly durable compared to standard drills. They have extremely hard carbide tips that can operate at higher speeds than most other types of traditional drill bits, meaning you won't need to replace them as often as regular drilling tools tend to wear out quickly due even with light tasks. When used correctly and maintained well, this tool can last for years!
For those looking for something extra from their centre drills, look no further: some varieties come with adjustable angles that allow users create shallow holes or countersinks—perfect for those delicate finishing touches like chamfered edges on wood or metal pieces! So not only does this tool help ensure greater accuracy when completing tasks but it'll help add a professional touch too!
4. How do I make sure a drill bit is centered?
Answer: Making sure a drill bit is centered is essential for accurate drilling and preventing damage to your materials. Before you begin, ensure that the drill bit itself is sharp and in good condition so it runs true when spinning. To center a bit on what you’re drilling into, use a scrap piece of wood or other material to create guides. You can also use masking tape become familiar with exactly where the center point needs to be. Then, lower the speed of your drill and gently touch the material at different angles until you find its exact spot in the middle. Lastly, mark that spot with an X or any other symbol before drilling all the way through it!
5. What is the other name of Centre drill?
Answer: Believe it or not, the other name for a Centre drill is actually a "Spot Drill"! This term may not be as commonly known but it's definitely accurate - Centre drills and Spot Drills are basically the same type of tool. Generally speaking, Centre Drills are made to produce conical holes (with an angle) in order to help center your drill bit, while Spot Drills can machine blind holes with precision. So if you're ever stuck trying to figure out what another word is for your Center Drill - just remember “Spot Drill”!
6. How many types of center drills are there?
Answer: Did you know there are actually 4 different types of center drills? Each type has its own unique characteristics and functions, making them essential for completing a variety of tasks. From the cone-shaped drill used for machining operations to the stepped drill that’s perfect for drilling out holes in cast iron or steel, these tools are incredibly useful when it comes to metalworking projects. Here’s a breakdown of all four kinds so you can better understand their differences:
Standard Center Drill– This is one of the most common types, featuring an angled tip with two cutting edges on each side and usually with 60° angles between them. It’s great for creating a starting hole before drilling something else into it.
Combined Drill & Countersink– This tool combines both countersink and center drills in one tool bit, allowing you to easily create precise holes at exactly the right angle that fit your needs perfectly. Popularly used in creating countersinks!
Step Drills– Step drills feature multiple steps which can be used to create conical-shaped or rectangular holes depending on what kind you have – either straight fluted or spiral fluted step bits can be ideal for drilling through cast iron or steel (as long as they’re tapered correctly).
Cone Drills - Cone drills offer precision when drilling deep holes in solid materials such as wood or metal due to having a large cylindrical head with two single-flute cutting edges at just 10° from its chisel edge body – this helps reduce wobbling and misalignment during operation while efficiently removing material quickly even at lower speeds!
7. What are the three steps used in drill?
Answer: Are you looking for a way to quickly drill holes into materials like wood, metal, or anything else? Well then you need to know the three simple steps of drilling!
Step 1: Gather your supplies. Make sure you have a drill bit that is correctly sized and shaped for your project, along with the appropriate safety gear like protective eyewear and gloves.
Step 2: Choose the right location. The surface where you will be drilling should be flat, level and stable so that there’s less chance of the drill slipping off track when in use.
Step 3: Get ready to go! Now it’s time for action - simply place the tip of the drill bit at your desired spot on your material, firmly hold onto the tool handle (making sure not to over grip it), press down slightly, begin applying pressure from left to right as you turn on the power switch and let ‘er rip! You may need some extra guidance if this is your first time around a drill so don’t be afraid to consult with an expert while doing this operation.
8. What is the tip angle on a center drill?
Answer: Whether you're a machinist, woodworker, or DIY-savvy home handyman, the tip angle on a center drill is one of the most important factors in performing a successful drilling operation. A center drill is typically used to create holes with depth greater than an ordinary twist drill bit can handle and it's also used for countersinking operations. The tip angle on this type of bit is usually between 60° and 82°—with an included angle of 118° and 132° respectively—and has two cutting edges that form an indicated point at their intersection. Knowing the correct tip angle of your center drills can make all the difference when it comes to accuracy and efficiency in any kind of hole-making job!
9. What are the 4 steps in the drilling process?
Answer: Looking to master the drilling process? This step-by-step guide will help you understand the essential steps of this essential task.
First thing's first: you'll need to prepare for the job by gathering the necessary tools, materials and safety equipment including a drill, bits, lubricant or oil if needed, clamps and an appropriate eye protection. You should also check your drill chuck is correctly tightened and secure.
Second step - locate where you're going to drill a hole. Use a marker or template stationery on thin material like sheetmetal as a guide for where to drill. When working with wooden surfaces it can be helpful to use tape to protect delicate edges when marking up before drilling into them. A center punch mark helps make sure that your bit won't slip while in motion so always double check if visibility allows! Lastly, ensure that there is adequate space around the area of operation so that space can be used without obstruction while drilling occurs; making sure no part of your body gets too close during this time.
Thirdly – choose the correct type & size of bit for what kind of hole needs to be drilled and insert it into the chuck/collet on top side of your machine very carefully ensuring it is properly seated at all times (depending on size & type). Ensure that rotation direction control lever placed appropriately too before turning on power source for starting rotations! For extra security some drills come with additional features such as torque settings or variable speed controls which may help assist with controlling how hard or gentle certain holes get made in any given surface (check machine instructions manual beforehand!). Take care whenever moving between different types as even slight variation should create differences upon contact with surface material being drilled into - not ideal especially if difficult reach areas are concerned…so take caution!
Finally - start slowly increasing speed until desired level – begin piloting ever so slightly at first then gradually increase speed accordingly depending on material hardness & thickness beforehand; always focusing solely upon precision accuracy during this whole moment! Make sure proper lubrication has been applied prior if necessary (again depending upon actual scenario) but again pay attention throughout entire process since many times mistakes occur through carelessness more than anything else….drilling isn’t meant as ‘racing sport’ after all ;-) As soon as completion achieved turn off power source quickly yet safely knowing job done right- hopefully learning lessons from entire experience too along way!!
10. What are the advantages of a Centre drill?
Answer: Centre drills, also known as “center bits” or “twist drills”, are an essential tool for any job that requires accurate drilling. Centre drills have many advantages over traditional tools, including increased accuracy and precision when making holes on round stock pieces. They can reliably drill multiple centre points quickly and efficiently without breaking, slipping, or wandering off the intended mark. Furthermore, they come with a self centring point which eliminates the need for manual alignment and minimises any chances of inaccuracy due to human error. Finally, because centre drills are made from high-quality hardened steel, they can be used in a variety of materials such as wood and metal making them perfect for everyday jobs around the workshop.
11. Which drill pattern is mostly used?
Answer: When it comes to drill patterns, the most common is likely the twist drill. It has a cylindrical shank with cutting lips that create helical flutes as they move around in a circular motion. This type of drill is designed to produce round holes in metal and other materials with great precision and accuracy. With its basic features, this particular pattern can be used for various applications such as drilling small parts or large-scale projects like masonry or woodworking tasks. It's also very versatile since it can cut through a variety of materials while also providing clean and precise cuts every time!
12. How do you sharpen a center drill?
Answer: Sharpen a center drill like a pro with these easy steps! First, set up your grinder or bench grinder. You need to ensure that it is securely attached and level. Place the center drill onto the grinding wheel and angle it slightly so that the cutting edge meets the wheel at an appropriate angle. This would be around 45 degrees for most sharpening jobs. Once you’re comfortable with this angle, lower the drill at an even rate while gradually moving it over the grinding wheel until you achieve an even grinding across its surface. Finally, use your fingertips to feel for any tiny burrs on the leading and trailing edges of both flutes – one final touch will help keep your workmanship superbly sharp!
13. What are the main types of drills?
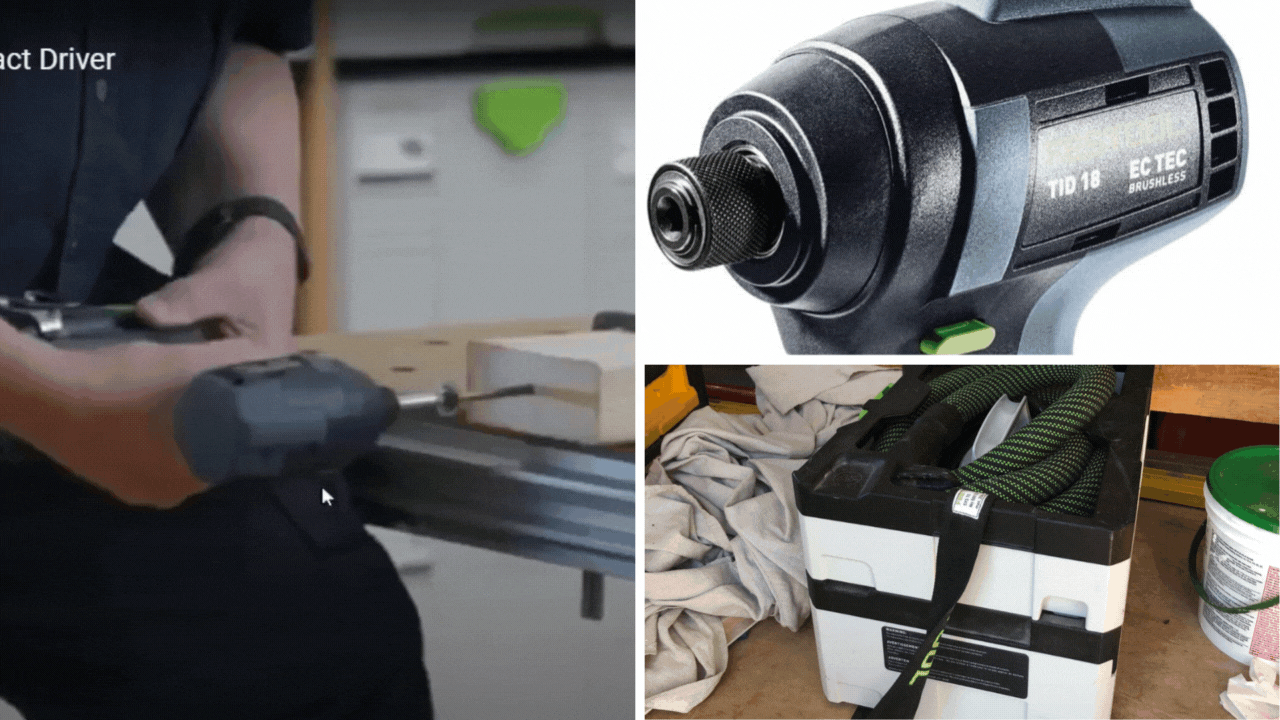
Answer: When it comes to the main types of drills, there are three commonly used varieties: cordless, hammer drill and impact driver. A cordless drill is a great basic tool for everyday drilling; it's lightweight and easy to use, either as an electric or battery-powered device. The hammer drill is especially helpful when working with masonry material such as brick and concrete. And thirdly, an impact driver uses rotational motion combined with repeated blows to drive larger screws into materials like wood more easily than a standard screwdriver.
14. What are the four main types of drilling?
Answer: Drilling is an invaluable technique used in many industries and applications, from oil and gas to infrastructure development. There are four main types of drilling that can be used depending on the job at hand: rotary, percussion (or hammer), auger, and cable tool drilling.
Rotary drilling is the most common method; it uses a rotating drill bit attached to a long pipe called the ‘kelly’ which cuts through rocks as it moves downwards into the ground. Percussion or hammer drilling involves taking a bit to chip away at rocks using impacts generated by hydraulically-driven hammers located at the end of a drill string. Auger drilling uses an auger with spiraling blades that grind and cut through material as it drills down into earth layers around subsurface voids such as water tables for geotechnical explorations. The last type of method is cable tool drilling where a weighted chisel-like bit attached to heavy cables slowly lifts stones up from below which are then removed from the hole with buckets.
Each type of drill has its own benefits when dealing with different kinds of projects, but all share similar goals: they make holes in order to explore or develop underground locations so we can access what exists beneath our feet!
15. How deep should you center drill?
Answer: Just how deep should you center drill? Well, it all depends on the type of material you're drilling into and what your end goal is. Generally speaking, an optimal depth for a center drill will be between .125 inches and .250 inches. For materials like steel or cast iron, this depth is enough to create concentric countersinks so that other drills can work with precision. If thicker materials are being used then deeper depths may need to be applied for successful results. Ultimately, when using a center drill, using the proper size bit at the right speed and applying light pressure until reaching the desired drilling depth will make all the difference!
16. What are the 5 main parts of the drill bit?
Answer: The drill bit is a tool you definitely don't want to be without when tackling any project, big or small. As the go-to tool for drilling holes in wood, metal, plastic and many other materials, the drill bit has five main parts that work together to create perfect holes every time. Here's what you need to know about each of the five components:
The Shank - This part connects the drill bit with your power drills’ chuck or collet so it can be securely held in place during use.
Cutting Edges - These are located on both sides of the tip and work together with a chisel edge at its center for creating clean cuts and ridges when drilling into material.
Web - The web is the body of your drill bit between its shank and tip which serves as an axial support while helping to reduce friction while cutting into hard materials like metal or plastic
Flutes - These helically spiral grooves are cut along with web allowing chips created from cutting through material escape as heat buildup happens during drilling action
5F Point - Located at the very end of your bits tip this cone shaped point works together with flute and cutting edges providing extra strength which helps guide drill making sure accuracy remains high throughout drilling process
17. What are 5 important rules for a drill press?
Answer: If you're serious about getting precise results when drilling, then it's essential that you know the five most important rules for using a drill press. Here are 5 pieces of advice to make sure your drilling is top-notch:
- Always ensure that the material is firmly clamped - this helps prevent movement and misalignment, which can reduce accuracy and cause dangerous kickbacks.
- Adjust the drill speed to match the material - different materials require different speeds in order to produce accurate results without overworking your tool or ruining your workpiece.
- Make sure the bit sharpness is up-to-date - dull bits will cause inaccurate holes as they drift away from their intended location rather than stay on course as they should do with a sharp bit in use.
- Use cutters of appropriate size - too small and it could slip resulting in potential injury; too big will put too much strain on motor, potentially damaging it permanently if done repeatedly over time; make sure your choice matches what’s needed for optimal results and longevity of tools used!
5 . Properly secure guards and shields before each use - these safety features protect against flying chips or sparks that could fly out from under heavy pressure during active use, possibly causing harm to yourself or others nearby at any given moment if not taken seriously enough every single time!