

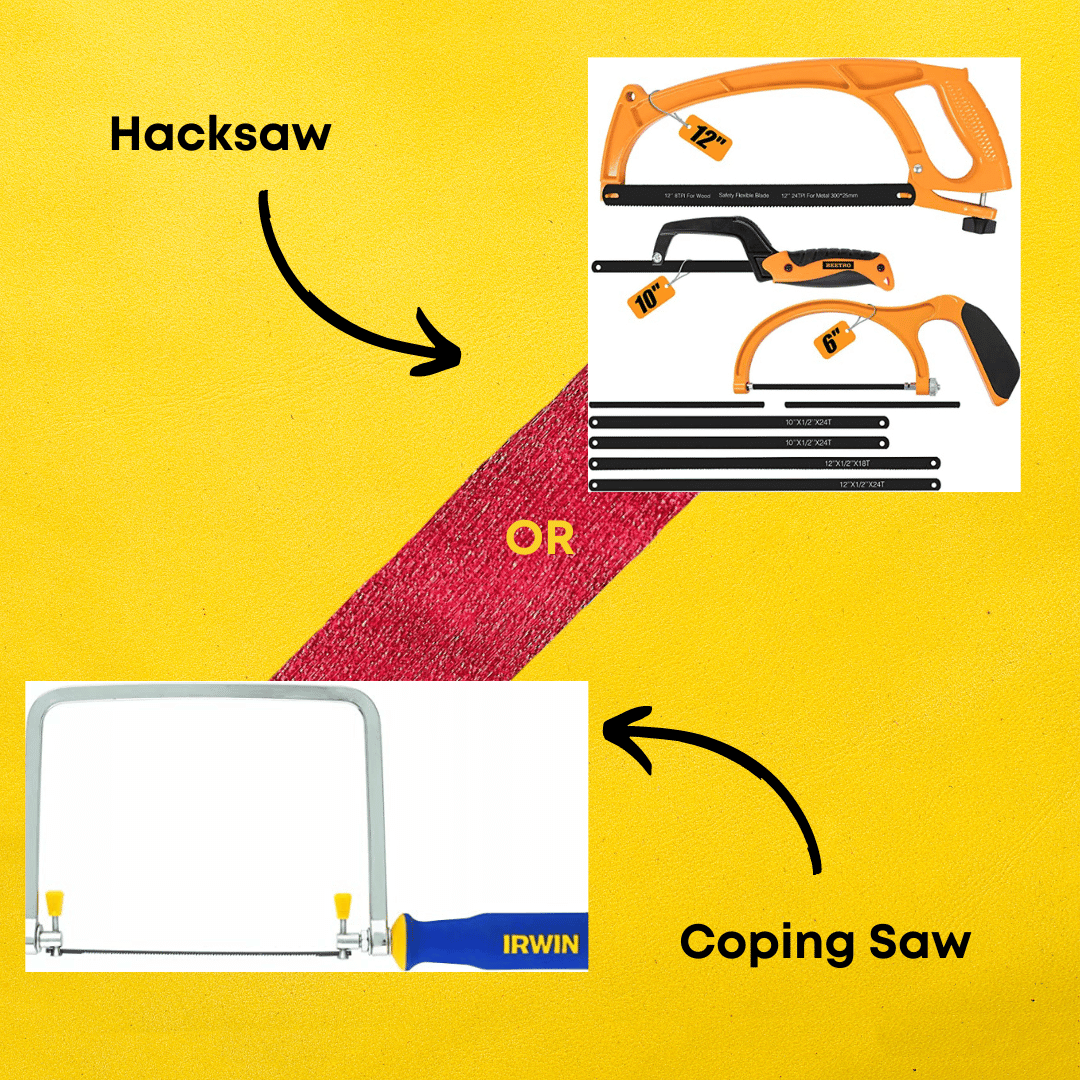
Are you stuck between choosing a coping saw or a hacksaw? Don't worry—we've got you covered! We've put together this article to help you decide which one is the best for your needs. Read on to find out which saw is the one for you!
Are you looking for the right saw for your next project?
When it comes to cutting wood, there are two saws that stand out as the best: the coping saw and the hacksaw. Both saws offer unique advantages and disadvantages, so it’s important to know which one is best for your needs.
The coping saw is a versatile saw that can make intricate cuts in tight spaces. It can also be used for cutting curves and circles. The hacksaw is a more powerful saw that can cut through tougher materials such as metal. It’s also great for making straight cuts.
Read this article to find out which saw is best for your project: Coping Saw vs Hacksaw: Which One is the Best?
The Differences Between a Coping Saw and a Hacksaw
You need to make a precise cut, but aren't sure which saw is best for the job.
Choosing the right saw can be a difficult decision. Both a coping saw and a hacksaw are great tools, but they each have their own unique strengths and weaknesses. How do you know which one is right for your project?
Our team of experts has researched the differences between a coping saw and a hacksaw to help you determine which one is best for your needs. We've done all the hard work so that you can easily find and purchase the perfect saw for your project.
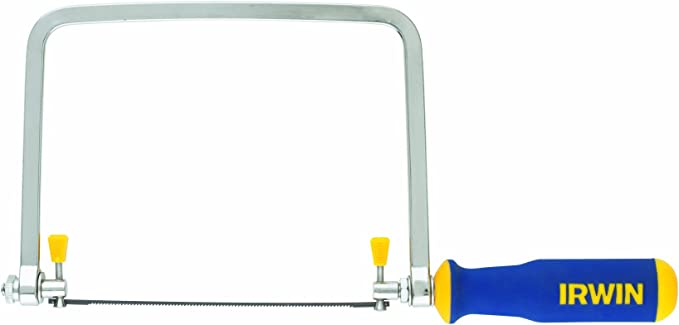
IRWIN Tools ProTouch Coping Saw (2014400), Blue & Yellow
BEETRO Hacksaw Frame Set, 12’’ Hacksaw Frame, 6’’ Hacksaw Frame and 10'' Mini Hacksaw, Including Six Extra Blades, Handsaw for Metal, Wood, PVC Pipes
IRWIN Tools ProTouch Coping Saw (2014400), Blue & Yellow
Why We Love It
The Irwin Tools ProTouch Coping Saw is the perfect tool for any DIYer. Its ergonomic handle ensures a comfortable grip and its unique blade design allows for precise cuts. The ProTouch Coping Saw features a hardened steel blade that is designed to last and is capable of making tight turns and intricate cuts. The ProTouch Coping Saw also features a built-in blade storage for easy access and convenience.
What You Should Know
The Irwin Tools ProTouch Coping Saw is the perfect tool for any DIYer. Its ergonomic handle ensures a comfortable grip and its unique blade design allows for precise cuts. The ProTouch Coping Saw features a hardened steel blade that is designed to last and is capable of making tight turns and intricate cuts. The ProTouch Coping Saw also features a built-in blade storage for easy access and convenience, making it the perfect tool for any job. The ProTouch Coping Saw is also more lightweight and compact than a traditional hacksaw, making it easier to transport and store.
BEETRO Hacksaw Frame Set, 12’’ Hacksaw Frame, 6’’ Hacksaw Frame and 10'' Mini Hacksaw, Including Six Extra Blades, Handsaw for Metal, Wood, PVC Pipes
Why We Love It
The BEETRO Hacksaw Frame Set is the perfect choice for anyone looking for a reliable and durable saw. This set includes a 12’’ hacksaw frame, a 6’’ hacksaw frame and a 10’’ mini hacksaw, along with 6 extra blades. The blades are made from high-grade steel and are designed to cut through metal, wood, and PVC pipes with ease. The ergonomic handle is comfortable to hold and ensures that you can use the saw for long periods of time without fatigue.
What You Should Know
The BEETRO Hacksaw Frame Set is designed for both professionals and DIYers. It is easy to assemble and you can quickly switch between the different sizes of blades. The blades are also easy to change, so you can quickly switch between different types of materials. The blades are designed to stay sharp for longer, so you don’t have to worry about replacing them often. The saw is also lightweight, so it is easy to carry around and use in different places.
BEETRO Hacksaw Frame Set, 12’’ Hacksaw Frame, 6’’ Hacksaw Frame and 10'' Mini Hacksaw, Including Six Extra Blades, Handsaw for Metal, Wood, PVC Pipes
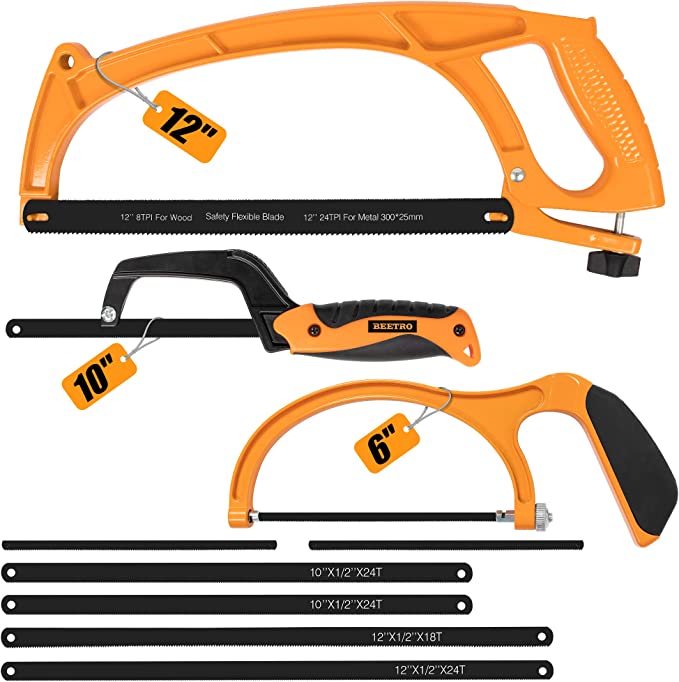
BEETRO Hacksaw Frame Set, 12’’ Hacksaw Frame, 6’’ Hacksaw Frame and 10'' Mini Hacksaw, Including Six Extra Blades, Handsaw for Metal, Wood, PVC Pipes
FAQs
1. How to Cut Metal with a Coping Saw?
Cutting metal with a coping saw can be a tricky task, but it’s certainly doable! First and foremost, make sure you select the appropriate blade for your saw. You will want to pick up a blade specifically designed for cutting through hard materials such as metal. Additionally, make sure the teeth on the blade are filed into one direction—having blades with teeth pointing in both directions won’t give you an effective cut.
When it comes to positioning your coping saw for maximum precision, start by placing the piece of wood onto your workbench (or wherever it is that you’re working). Then adjust and secure your coping saw so that its perpendicularity is just right when placed against the material. Make sure not to exert too much force while adjusting or securing it since all of this should be done delicately to achieve accuracy.
Once everything is properly aligned and secured, begin by making light cuts at first—this will provide more control over the movements while controlling any possible vibrations or skipping issues that might otherwise arise from forcing through hard material like iron or steel using a coping saw. After making those initial lighter cuts along the outline of where you would like to cut out in full detail, go back over them and apply slightly more pressure as needed for a cleaner finish until finished cutting out whatever shape desired within reasonable tolerance levels according to your project's needs.
Finally keep some oil on hand nearby; adding small drops during longer periods of use can help ensure smoother operation and extend overall life expectancy of both blade and tool!
2. How to Cut Metal with a Hacksaw?
Cutting metal with a hacksaw may seem like a difficult task, but it's actually quite easy! All you need is the right tools and technique and you can easily cut through almost any kind of metal.
First, make sure you have the right tools for cutting metal. You'll need a hack saw with fine teeth that's designed specifically for cutting metal. If possible, opt for an adjustable blade as this will allow you to adjust the tension in order to get better control over your cuts. In addition, always use blades made from high-speed steel or carbon steel as these are more resistant to wear and tear when cutting materials such as metals.
Once you have your saw ready, start by marking where exactly on the sheet of metal that needs to be cut. This will help ensure accuracy during the process so take your time here and measure twice if necessary! Once done, line up your saw parallel with the marks before beginning to cut – this will also help provide accuracy throughout! Remember that when hacking away at sheet metals it's important not to press too hard otherwise risks of breakages increase significantly; instead try applying gentle pressure throughout keeping both hands steady for better control over where exactly the blade is going into contact with.. This method ensures smoother strokes which should result in cleaner cuts no matter what type of material being dealt with – from aluminum alloys, stainless steel and even titanium alloyed sheets can be successfully hacked without any major difficulties afterwards including warping due stress put upon them from hasty measures taken by those unfamiliar with proper handling protocols!
At times it may even become necessary (such as dealing thicker pieces) for one stop frequently along their route in order give themselves some much needed rest; allowing both arms recovery periods between strokes allows not only safety precautions be taken yet efficiency increased given how stopping lessens fatigue on body parts responsible during operation thus ensuring my productive performance overall during job execution whilst reducing chances mishaps occurring via improper handling taking place later afterwards due exhaustion caused priorly beforehand too easily bypassed otherwise since one was already feeling they were getting near completion - safe practices never go out style afterall - remember patience yielded dividends everytime!!
Finally once done simply clean off any residue left behind using cloths/wipes/towels etc – doing so minimizes chances accidents happening or future issues developing due corrosion brought upon uneded deposits being left behind unnoticed , everthing goes back position thus completing task & think users now know exactly how go about next time incoming materials need handled accordingly .
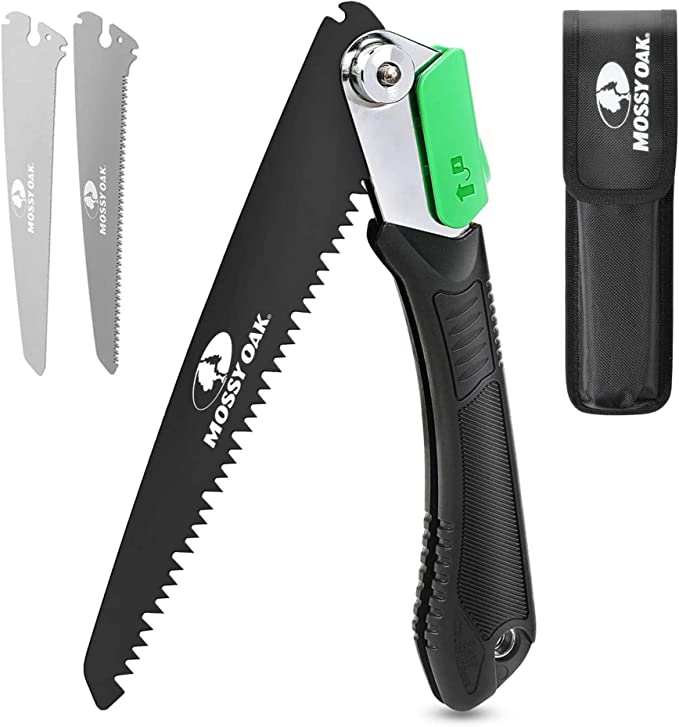
MOSSY OAK 3 in 1 Folding Saw, Pruning Hand Saw with Wood, Metal and PVC Blade, Camping Saw for Backpacking, Hunting and Bushcraft, Pouch Included
3. The Differences Between a Coping Saw and a Hacksaw?
A coping saw and a hacksaw are two very useful tools for performing different tasks in the workshop. Both have their own distinct characteristics that make them ideal for different cutting jobs, so it is important to understand the differences between the two before deciding which is best suited to your project.
The primary distinction between a coping saw and a hacksaw is size. A coping saw typically has an approximately 6-inch blade held in a U-shaped frame, while a hacksaw sports an 8-12 inch blade held in an L-shaped frame.
When it comes to cutting capabilities, both tools are capable of making straight cuts or curves if necessary. The difference lies in how thick of material each tool can handle safely and with precision – as expected, larger blades mean thicker materials can be cut more easily. Specifically, with its long profile, a hacksaw can cut through steel up to ¼ inch thick while still maintaining accuracy and safety within specific parameters; typical paring work (such as small radiuses or gentle curves) would better be handled by the coping saw’s smaller blade size which makes it easier to work with delicate tasks or thinner sections of metal such as aluminum or brass sheeting.
Finally, because they have different sizes there will also be minor differences when handling either tool – due to reduced leverage offered by their shorter blades combined with lighter frames made from wood (as opposed to metal), alleviating fatigue during use makes copingsaws slightly more comfortable when working for extended periods of time than using a hacksaw would be.
To summarise: if you need precise cuts on steel pieces up to ¼ inch thick then you should choose the larger blades provided by the hacksaw; however, since coping saws offer more dexterity and less stress during use thanks to their smaller design this should be your go-to choice whenever thinner materials needs attention that requires extra finesse!
4. How thick can coping saw cut?
Coping saws can cut through a wide range of materials, depending on the size and type of blade used. With a general-purpose or medium-hardness coping saw blades, you can typically cut through wood up to 2 inches thick. If you're looking for more precision or want to work with harder materials like metal, then opting for a fine-toothed blade is your best option as it can handle thicker cuts more easily. Additionally, investing in an adjustable frame coping saw allows you to change the distance between the blades and adjust how thick your cuts can be.
Using this kind of specialized tool offers even greater control over what types of thicknesses you'll be able to cut with your coping saw; these models are designed such that they can tackle cuts up to 3 inches in depth without too much difficulty! No matter which option – basic or specialty –you decide upon, make sure that the maximum cutting depth matches your requirements before purchasing one!
5. How tight should coping saw be?
When it comes to determining how tight a coping saw should be, there are a few key things that you'll need to take into account. Firstly, you should make sure that the blade is securely attached! If your blade slips or wobbles during use, then it can affect the quality of your work and can even be dangerous if it's slipping in an unexpected way.
To ensure that a coping saw is properly tightened for optimal use and safety, start by choosing the right size of saw blade for your project. Different copingsaw blades have different thicknesses and widths, so pick one based on what type of material you'll be cutting through - thicker blades are better suited for tougher materials like metal or hardwood while thinner blades will do just fine when working with softer woods.
Once you've got the appropriate sized blade attached to your saw frame snugly (but not too tightly!), run your hand along each side of the frame parallel to where the teeth are located - they shouldn't feel loose at all before proceeding with any cuts. Repeat this process on both sides until everything feels nice and secure without being so tight that moving it becomes difficult or painful.
In addition to making sure that everything is well-secured in place, also check periodically throughout your work session to make sure nothing has come undone over time due to vibrations or other movements from using the saw frequently. If needed make small adjustments mid-cut as necessary! This will help ensure accuracy in whatever craftsmanship projects you plan on doing with its help!
6. Are all coping saws the same?
No, not all coping saws are the same. The type of saw you use is determined by the material you're cutting and what shape or design you need to achieve with your project.
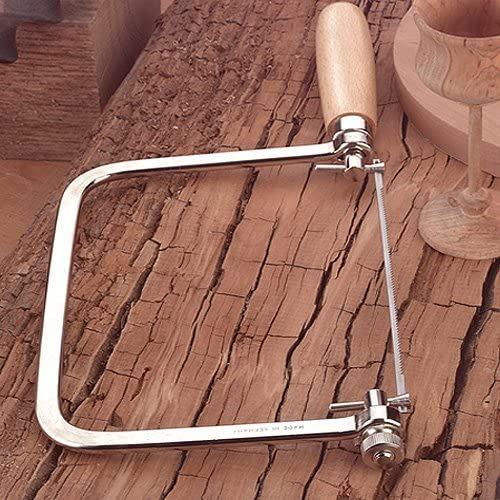
A coping saw is usually a small, handheld tool that uses a thin, narrow blade attached to a handle in order to make intricate cuts in wood and other materials. It’s most commonly used in carpentry, furniture-making and fine craftsmanship where precision cutting is needed without leaving behind too much waste material.
The blades themselves come in various lengths, styles and thicknesses depending on what type of job they’re being used for—there are standard blades made from carbon steel as well as more specialized types like diamond-tipped ones for working on tougher woods like teak or rosewood. The size of the teeth (the number of points along each edge) should also be considered when selecting a blade; finer teeth will produce smoother cuts while coarser ones can cut faster with less tear-out or chipping away at the edges.
The actual handle itself can come with different features such as adjustable tensioning knobs which allow for easier control over how tight the blade fits into the frame's support slots; some models offer multiple handles so two people can use it at once for bigger jobs; others have built-in magnifying lenses or LED lights so detail work looks clearer under brighter conditions.
Ultimately, choosing which coping saw to use comes down to assessing your project needs since every one offers different benefits; there is no “one size fits all” solution when it comes to these tools!
7. Can you sharpen a coping saw blade?
Absolutely! Sharpening a coping saw blade is actually a fairly simple process that anyone can do provided they have the right tools.
First, you'll need to remove the blade from the coping saw frame. To do this, carefully unscrew and remove any screws or nuts holding the blade in place. Once removed, hold it up against a light source, such as natural sunlight or a bright lamp, and inspect it for nicks and burrs along both sides of the teeth as these will need to be filed down with an appropriate file before sharpening begins. Use either an over-file (for filing one side only) or a flat bastard file (for filing both sides). Be sure to work slowly so as not to damage too much material when filing down burrs and nicks; if needs be use extra caution around delicate areas of the blade that may contain fine details near the tips of each tooth.
Once all nicks and burrs are removed from both sides of each tooth move on to sharpening with whetstones or diamond stones depending upon which you prefer—likewise for your cutting application (whetstones work better for general purpose cutting while diamond stones are more suited for fine cut detailing). Start by soaking your whetstone/diamond stone in water for several minutes prior to use then begin rubbing each side at an angle between 40°-45° while applying slight pressure until each edge is honed nice and smooth across every tooth; be sure not to press too hard during this process otherwise you risk ruining your sharpened edges due to overheating aka "thermal shock". Undo any remaining tension that may have built up during honing by taking off additional layers width wise until everything runs evenly again then finish strong by giving your newly sharpened blades one last soak in clean oil followed by wiping them dry with cotton cloths.
There you have it! Now get out there and start trimming some wood like it's nobody's business!
8. What holds the blade in a coping saw?
The blade in a coping saw is secured by its frame, which acts as the handle. The frame is attached to the cutting edge of the blade with either a screw or a thumbscrew. The combination of tension and angularity between these two parts allows for controlled back-and-forth cutting motion while in use.
When replacing the blade, make sure to align it so that it runs right along the center line of the frame and then press firmly on both sides to secure it into place. It's important to ensure that there is no gap existing between the teeth and slot on each side of your sawblade as this can be dangerous when cutting objects with precision or speed.
Once you are done replacing your blade, give it a little nudge back and forth until you feel some resistance (which means its properly fitted). This will evenly distribute pressure across all points of contact between blade and frame while also creating enough tension for precise control when making cuts in wood or other materials with ease!
9. How tight should coping saw be?
When it comes to coping saws, tension is key! Since the blade of a coping saw is relatively thin and prone to bending, it's important that you adjust the tension setting for a snug fit. This ensures that you have maximum control over the cutting motion and helps to prevent the blade from buckling or snapping while in use.
To adjust your coping saw’s tension setting, start by unscrewing the thumb screw until it becomes loose. Next, place your chosen blade on top of the frame so that its teeth are pointed forward and facing down. Then tighten up each end of the blade with your fingers; this will create even pressure along both sides of the guard plate at once. Finally, using a flathead screwdriver (or some other tool if available) turn clockwise around all four corners until there is a noticeable resistance between them - this will indicate a proper tension level for use with most blades. Depending on what type of material you plan on cutting (and how thick it is), you may want to tighten or loosen accordingly after testing out some cuts first.
It's important to remember that too much tension can make cutting more difficult or cause damage to your material; likewise not enough can also cause problems like bending or breaking blades mid-cut - so always practice caution and good judgement as necessary! As long as you adhere to these guidelines and check your settings regularly before each cut, then hopefully this should provide plenty of guidance for anyone looking for an answer on how tight their coping saw should be!
10. Should coping saw be push or pull?
When using a coping saw, it's important to remember that the blade should be pushed in order to cut through the material. This may seem counter-intuitive since most saws are traditionally pulled when cutting, but because of the way that copings saw blades are designed, pushing is always preferred and gives you more control over your cuts.
The key difference with a coping saw is that its blades have thin metal teeth which are facing downwards towards the object you’re cutting into. This design makes pushing easier and helps ensure an even cut as it pulls away from any burrs or rough edges caused by pulling on the blade while cutting. By pushing instead of pulling with every stroke, your cuts will be cleaner and precise.
Furthermore, when you pull backwards during a cut with a coping saw there’s also greater risk for kickback which can pose personal safety risks - something which can easily be avoided by simply remembering to push instead of pull! To add an extra layer of safety precaution when using this type of tool it’s also advised to only use blades made specifically for copying saws since they're much thinner than standard hacksaw or handsaw blades and therefore safer as well as providing better performance on specific materials such as wood or plastic pipes.
It may take some time getting used to at first because we all tend to naturally default to pulling rather than pushing but in terms of comfort and precision using this type tool – particularly when making intricate cuts – learning how to wield a copying saw correctly will pay off in spades!