
If you have ever tried to cut mitered joints, then you know it can be a challenge. It is important to get it right the first time, because if not, your entire project could be ruined. This guide will walk you through the steps for creating perfect mitered joints every time and offer tips for fixing any gaps that may occur.
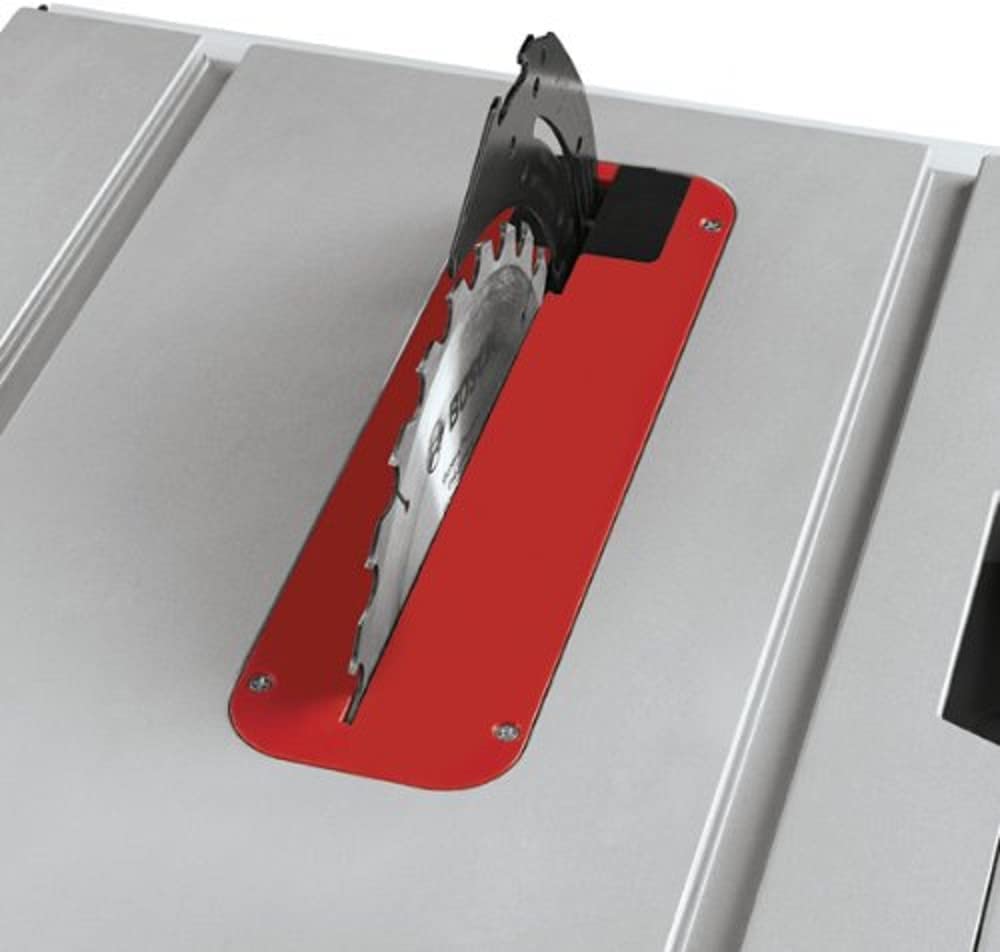
1. Setting Up Your Table Saw Blade
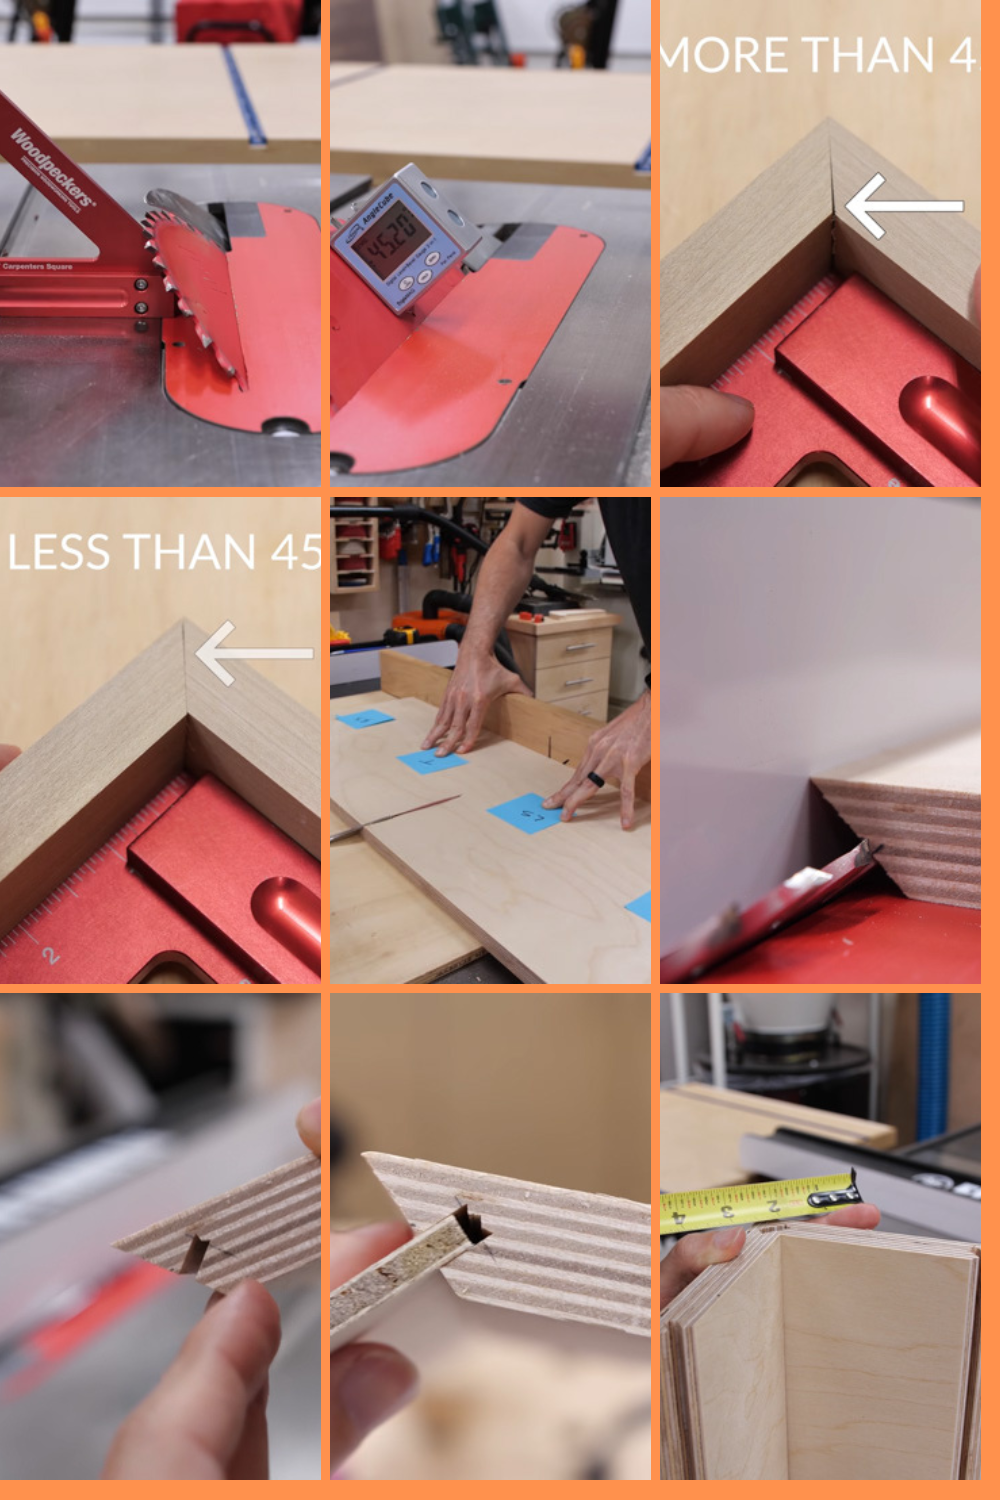
The first step in cutting mitered joints is setting up your table saw blade correctly. You will want to make sure the blade is set to 45 degrees; this will ensure that each cut is precise and consistent. To do this, use a protractor or angle finder to measure the blade angle and adjust as needed until it reads 45 degrees.
2. Cutting Mitered Joints Once your blade is properly set,
you are ready to start cutting your mitered joints. Start by marking the pieces of wood exactly where you need them cut; this helps ensure that all cuts are lined up correctly without any guesswork involved. Then place each piece of wood into the miter fence so that it is held securely in place while you make your cuts. You can then make your cuts by slowly pushing the wood through the spinning saw blade while keeping a firm grip on both ends of the piece being cut. Make sure that all cuts are made with even pressure and at an even pace for precision results.
3. Setting Up Spline Cuts Splines are added reinforcement pieces used in mitered joints for extra strength and stability.
To create splines, start by cutting slots into both sides of one side of the joint about halfway down from each end of the wood piece being cut using a router or a dado blade on your table saw. Once these slots have been created, make sure they line up with corresponding slots on each side of the second piece of wood before making any additional cuts.
4. Cutting Splines With Slots Cut Once all spline slots are in place,
you can begin cutting splines for those slots using either a router or a dado blade on your table saw. Start by placing one end of the spline into one slot and then slowly pushing it through both slots until it comes out at the other end; repeat this process with remaining splines until all slots are filled with sturdy reinforcement pieces that fit snugly inside them without any gaps or loose edges.
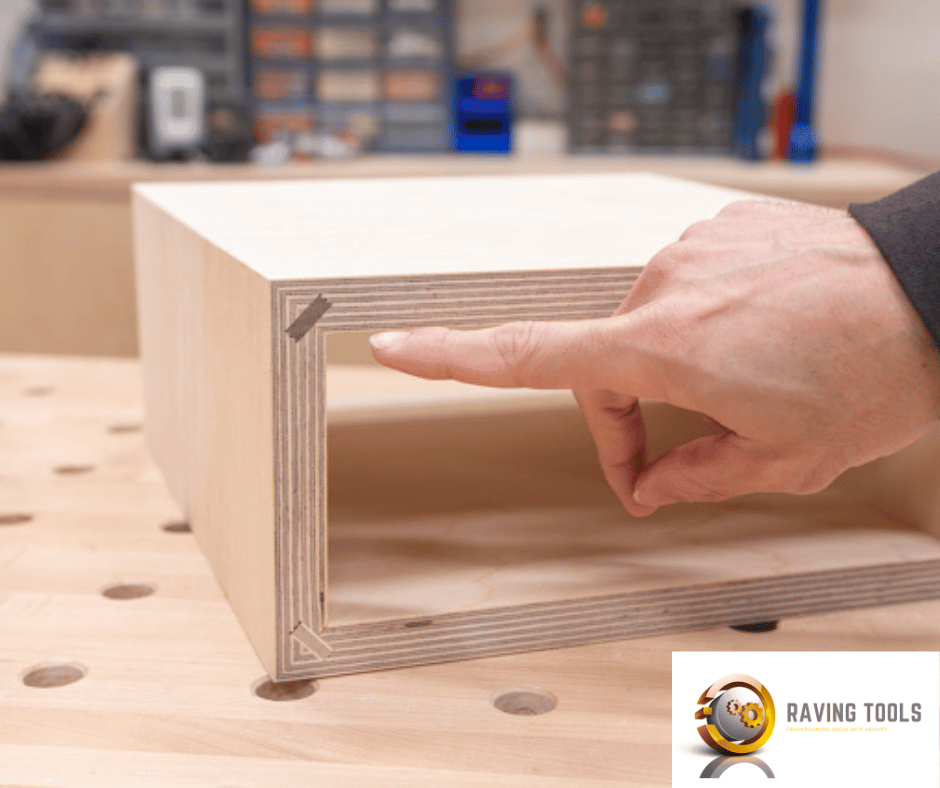
To get a beautiful result, I carefully constructed the joint first and took note of how much space was needed when fitting in my ¼” plywood. However, to really make things stand out, I milled some walnut up as an example - but if you're feeling brave enough for this level of contrast between your materials be sure that they fit almost perfectly together or else there may be gaps! If all else fails though don't worry; during assembly I'll show you another solution that won't let you down.
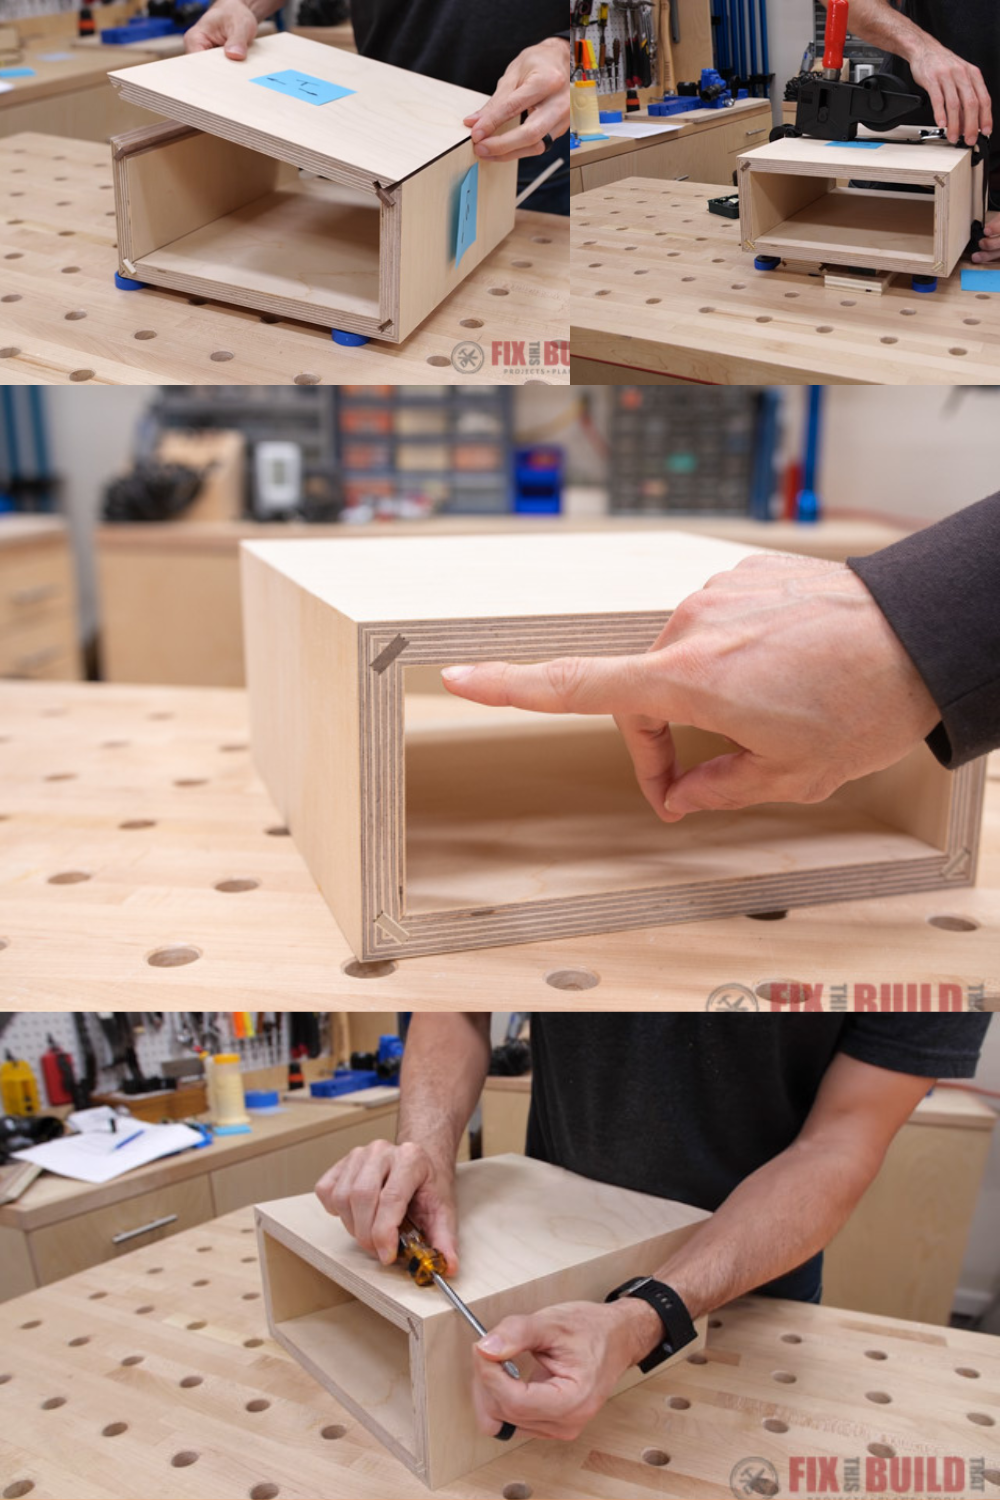
5. Assembling large projects can be complex,
But splines are here to help! Cutting the pieces of wood and marking them correctly beforehand makes dry fitting a breeze. When it comes time for assembly, use the marked-down and cut splines as support so you don't have to worry about clamps or tape—and even inspect your masterpiece with ease before making sure everything is in place.
Dry Fit Using Splines
Spend some quality time gluing up your splines with a slow-setting adhesive! Not all glue is created equal, so use one that has an open time of 10 minutes or more for the best results. For extra hold and durability in extreme conditions, find an exterior or specific slow set adhesives to give you 20 - 30 minutes of workable application window.
Gluing Up Splines
For a secure fit, give the spline a light coating of glue and slot it into place. Too much adhesive could cause excess squeeze out on tight joints - so use just enough to hold them steady!
During glue up, don't forget to grab a ratchet strap if you're in need of an extra helping hand! Then once everything's set and dried, break the sharp edges on your mitered corners with caution - we wouldn't want any veneer blowouts now. And maybe add some more clamps here and there while you're at it for maximum tightness.
Clamp Mitered Joints Gluing Up Splines
I wanted to get the mitered joints super snug, so I turned to a web clamp! Its smart design features wrap-around pads that give it great tension without smashing the corners. Perfect fit every time - no more worries about wobbly edges!
6.Taking on miter joints to fill in gaps?
We've got a trick up our sleeve! Carefully running a screwdriver along the edges towards the corner can easily solve those pesky openings. Just be extra careful with plywood so you don't break off any surface veneer - that's an easy miss if not done properly.

BOSCH GCM12SD 15 Amp 12 Inch Corded Dual-Bevel Sliding Glide Miter Saw with 60 Tooth Saw Blade
Final thoughts:
Don't worry if you feel intimidated by the thought of cutting mitered joints - with detailed steps, even beginners can conquer this task easily! No matter your skill level, we've got all the guidance you need to make sure yours look great.